Larry in SD
Handloader
- Nov 8, 2004
- 426
- 1
I actually started this project a year ago, then scrapped the whole project.
A month or so back I got the urge once again so this time I just went and bought a Ruger Charger.
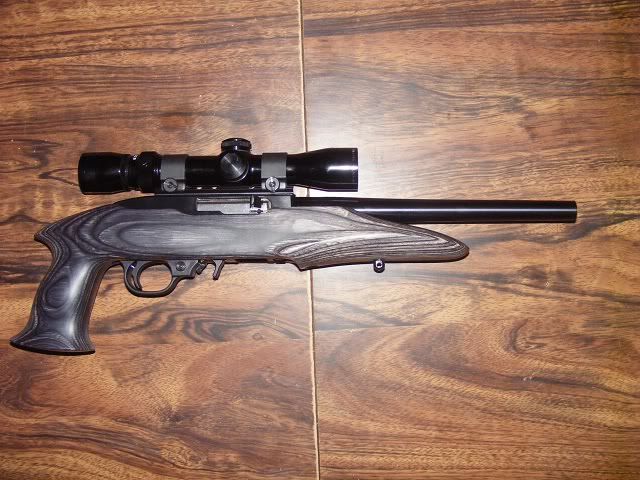
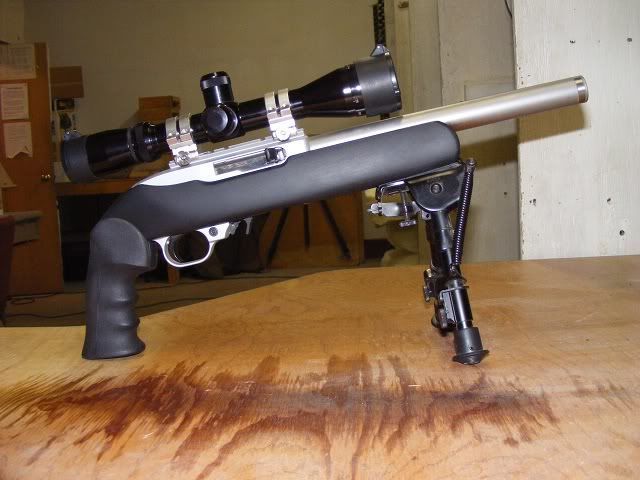
I shot the Charger in the above configuration for a hundred rounds or so and knew I had to make some changes. I quickly removed the factory stock and barrel. I then decided on a replacement. For the Barrel I selected a 10" Bead Blasted Stainless Steel KIDD Bull Barrel. I then sent the receiver, an aluminum trigger housing (that had previously been sent to TT Shooter in Modesto California for one of his Precision Trigger Jobs. It breaks super crisp at 1 3/4 pounds.) and scope base to John Norrell Arms to be refinished in their "Stainless-Steel" Norrell's Moly Resin finish. (The Ruger Charger came with the new Plastic Trigger Housing and Trigger which I put in my plinker 10/22 and used the Aluminum Trigger Housing from that Plinker to have tuned for this Charger.)
I then took the factory Ruger Bolt to my local machinist buddy and he milled the breechface to set the headspace at .043", pinned the firing pin so it can not ride up. I finished the bolt work by chamfering / radusing the rear face of the bolt that the hammer rides against during cycling.
I topped off this Charger with a 3x12x Burris LER Handgun Scope with a Fine Plex Reticle and Target Turrets in Silver 1" Weaver Quad Lock Scope Rngs.
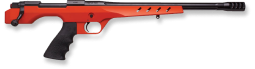
My local gunsmith is working on a Custom Stock for me, but it is not finished yet. He is adapting a T/C Contender Grip to a Cut Off / Modified Ruger 10/22 Stock. In the meantime I decided to try a Tactical Innovations REBEL Charger Stock (which is the stock in the photo). Yeah I know I shouldn't have sold the Factory Charger Stock before my Custom Charger Stock was finished but I wanted to try the Tactical Innovations REBEL Stock anyway, besides I am impatient.
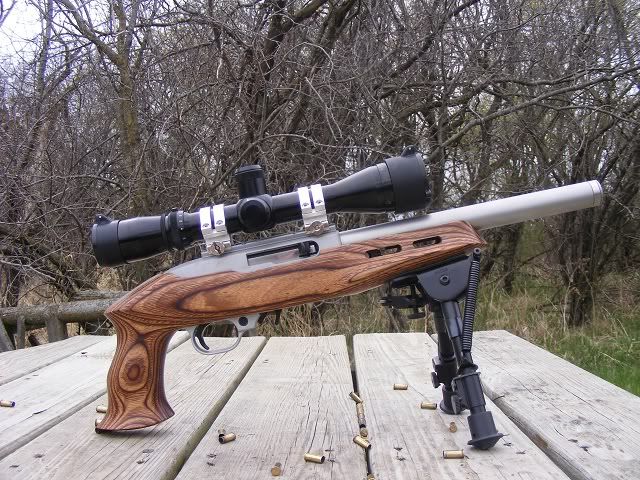
Above is a photo I snapped of my Custom Ruger Charger while at the range today. I was actually quite pleased at how the Norrell's "Stainless Steel" Moly Resin Finish matches up with the Bead Blasted KIDD Stainless Steel Bull Barrel.
I had previously zeroed this Charger at the Indoor Shooting Range at 18 yards. Todays goal was to try to determine what kind of accuracy I could expect at 100 yards. I only shot SK Jagd Standard Velocity Hollow Points and Wolf Match Target today and was rewarded with 5 shot 100 yard groups ranging from 1.350" to 2". All in all I was pleased considering this new KIDD Barrel only now has 190 rounds through it after todays range session.
I also spent some time trying out the new Egg Silhouette Rack I just completed.
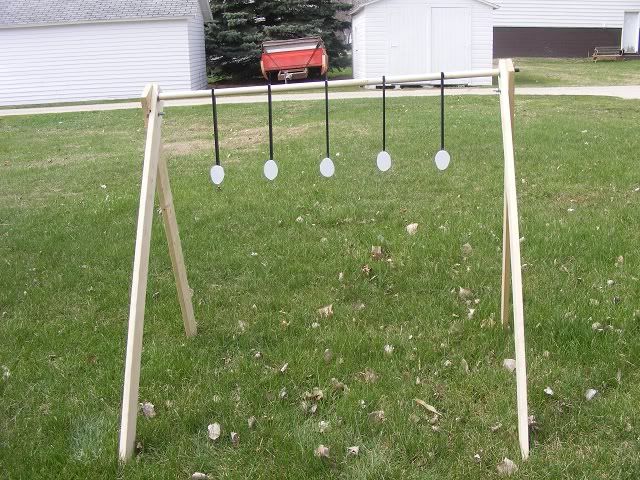
Each fall our local shooters club holds an egg shoot. We set up 5 chicken eggs at 50 & 100 yards for rimfires. At 50 yards the shooter is restricted to using an optic of 9x or less but at 100 yards there is no restrictions on magnification, anything goes. I decided to build a set of Steel Egg Silhouettes to use for Practicing. I figured this would be quick to set up and loads of fun for the Grand Kids to shoot.
On this session I set up the Egg Rack at 50 yards. I must say that the Egg Rack worked perfectly and is not going to require any modifications at all. I burnt up about 50 rounds shooting eggs but that was only part of it. I had along my Ruger / Archangel 10/22 with an old 4x40mm Tasco World Class Riflescope on it for the grand kids to have their way with the egg rack. And have their way with the egg rack is indeed what they did.
It was a very fun day at the range, and for once everything worked as it should have.
Thanks for reading.
Larry
A month or so back I got the urge once again so this time I just went and bought a Ruger Charger.
I shot the Charger in the above configuration for a hundred rounds or so and knew I had to make some changes. I quickly removed the factory stock and barrel. I then decided on a replacement. For the Barrel I selected a 10" Bead Blasted Stainless Steel KIDD Bull Barrel. I then sent the receiver, an aluminum trigger housing (that had previously been sent to TT Shooter in Modesto California for one of his Precision Trigger Jobs. It breaks super crisp at 1 3/4 pounds.) and scope base to John Norrell Arms to be refinished in their "Stainless-Steel" Norrell's Moly Resin finish. (The Ruger Charger came with the new Plastic Trigger Housing and Trigger which I put in my plinker 10/22 and used the Aluminum Trigger Housing from that Plinker to have tuned for this Charger.)
I then took the factory Ruger Bolt to my local machinist buddy and he milled the breechface to set the headspace at .043", pinned the firing pin so it can not ride up. I finished the bolt work by chamfering / radusing the rear face of the bolt that the hammer rides against during cycling.
I topped off this Charger with a 3x12x Burris LER Handgun Scope with a Fine Plex Reticle and Target Turrets in Silver 1" Weaver Quad Lock Scope Rngs.
My local gunsmith is working on a Custom Stock for me, but it is not finished yet. He is adapting a T/C Contender Grip to a Cut Off / Modified Ruger 10/22 Stock. In the meantime I decided to try a Tactical Innovations REBEL Charger Stock (which is the stock in the photo). Yeah I know I shouldn't have sold the Factory Charger Stock before my Custom Charger Stock was finished but I wanted to try the Tactical Innovations REBEL Stock anyway, besides I am impatient.
Above is a photo I snapped of my Custom Ruger Charger while at the range today. I was actually quite pleased at how the Norrell's "Stainless Steel" Moly Resin Finish matches up with the Bead Blasted KIDD Stainless Steel Bull Barrel.
I had previously zeroed this Charger at the Indoor Shooting Range at 18 yards. Todays goal was to try to determine what kind of accuracy I could expect at 100 yards. I only shot SK Jagd Standard Velocity Hollow Points and Wolf Match Target today and was rewarded with 5 shot 100 yard groups ranging from 1.350" to 2". All in all I was pleased considering this new KIDD Barrel only now has 190 rounds through it after todays range session.
I also spent some time trying out the new Egg Silhouette Rack I just completed.
Each fall our local shooters club holds an egg shoot. We set up 5 chicken eggs at 50 & 100 yards for rimfires. At 50 yards the shooter is restricted to using an optic of 9x or less but at 100 yards there is no restrictions on magnification, anything goes. I decided to build a set of Steel Egg Silhouettes to use for Practicing. I figured this would be quick to set up and loads of fun for the Grand Kids to shoot.
On this session I set up the Egg Rack at 50 yards. I must say that the Egg Rack worked perfectly and is not going to require any modifications at all. I burnt up about 50 rounds shooting eggs but that was only part of it. I had along my Ruger / Archangel 10/22 with an old 4x40mm Tasco World Class Riflescope on it for the grand kids to have their way with the egg rack. And have their way with the egg rack is indeed what they did.
It was a very fun day at the range, and for once everything worked as it should have.
Thanks for reading.
Larry