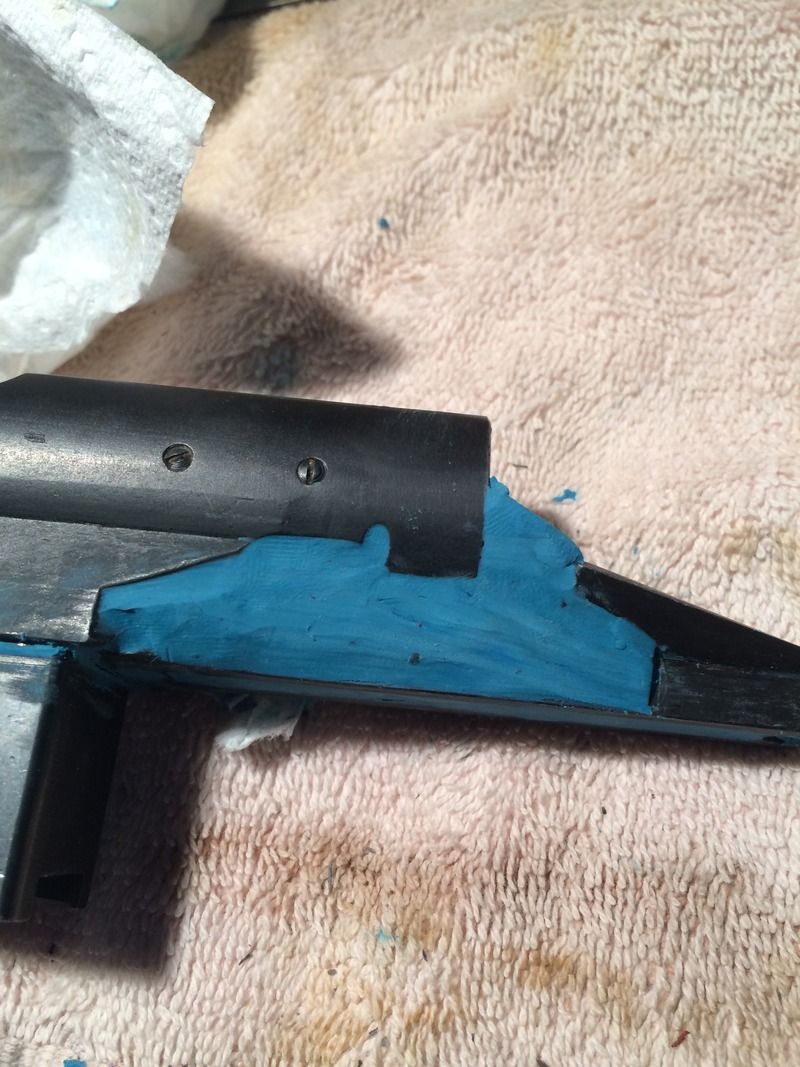
Bedding

Jake,

Take the trigger assembly off and fill with modeling clay or play doh. Gently wipe the release agent over the clay/playdoh. When you pull the action out, some of the clay/playdoh may stick to the bedding compound, but just wipe it away with a paper towel.


Use the pins that came out of the trigger assembly to push the clay out of the holes, unless you have some same diameter wire laying around. It is a bit scary the first time you set the action in a stock filled with compound, but rest assured when you put on enough release agent, it will come out.
 
Pats the ninja with that stuff. Marine Tex was his idea. It's been excellent for me. I should buy a gallon of the stuff.
 
nvbroncrider":2bg2fuus said:
So what your saying is cover the whole stock and action in release agent if you don't want anything there and then cover it again.
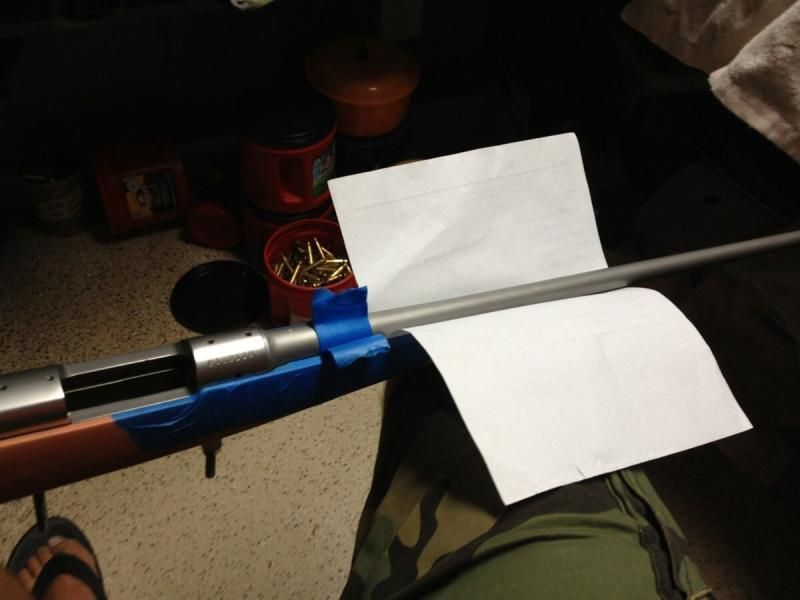
Remove everything as already noted.

I NEVER put any on the stock. Use blue masking tape (easy to remove) on whatever part of the stock you don't want to get bedding material on. It will peel off easily whether before or after the bedding material is completely dry, and there is no residue. Works like a charm.

You can't put too many layers of Kiwi on the action, but be sure to buff it all off just like waxing the car. You only need a microscopic layer on there, and anything else will make the bedding job look horrid. Leaving too much on is a common first timer error.

Use bolts with the head cut off to center the action in the action screw holes. I usually use the same blue tapewrapped around the bolts to make them "just" fit into the stock. This centers the action, centers the screws in the holes, and really does help. Again, apply Kiwi or release agent of choice.

Don't forget to apply tape to appropriate surfaces EXCEPT the rear of the recoil lug.

I squirt a small amount of WD-40 into a glass baby food jar and then use slightly damp Q-tips to remove excess bedding material once the action has been placed in the stock. It works great.

Kiwi can also be applied to the Play-Doh or whatever you use so it doesn't stick to the bedding material.

Good luck!
 
Yeah blue tape works wonders. Here is my daughters rifle. I use the tape in about 10 layers about 1.5 inches in front of the recoil lug. It does two things:

1. helps to center the barrel in the channel and assure free floating to the area of the tape.
2. builds a dam so the bedding compound looks nice and square to the barrel and perpendicular to the recoil lug.

 
And I do the same as Charlie.

Bed the recoil lug, and the 1.5 inches of chamber along with rear tang at same time.
then I go back and touch up any areas that the bedding didn't get to. Then I do the bottom metal completely. Then I skim bed the entire magazine area for weather proofing.

Kind of overkill, but I like messing with this stuff and if keeps me sane... or insane.. not sure which :)
 
Tape both the bottom and rear of the recoil lug and nothing on the front just release agent and then cover the tape in release agent too.
 
Jake I tape the bottom, sides and rear of lug bu that is just me. . I use a razor to cut it to fit and yes use release agent.
 
I never bed around the trigger, just the pillars, under the rear tang and around the recoil lug.
 
I skim bed the whole action 'cuz we doctors are anal retentive. :mrgreen:

I also tape the sides, front and when appropriate bottom of the recoil lug. My standard is 2 layers of tape, as I find having to work hard at getting an action out every time you need to remove it is a major PITA. You want the rear of the lug to be held in place during recoil; who cares about the rest of it (so to speak).

I place a circle of tape to center the barrel just shy of the little support pads at the end of the forearm, not close to the action.

I often put 2 layers of tape at the start of the barrel and 1 on the bottom of the barrel channel at the same point. The bottom one often gets release agent (the only part of the stock I apply it to) so I can remove any bedding material from this area. As a result I do not bed any of the barrel.

Many ways to do this, and each finds their own.
 
Well I got the hard stuff done.
 

Attachments

  • image.jpg
    image.jpg
    1.2 MB · Views: 1,400
  • image.jpg
    image.jpg
    1,015.1 KB · Views: 1,399
  • image.jpg
    image.jpg
    1.3 MB · Views: 1,399
  • image.jpg
    image.jpg
    1.1 MB · Views: 1,399
  • image.jpg
    image.jpg
    1.2 MB · Views: 1,400
  • image.jpg
    image.jpg
    1.2 MB · Views: 1,400
Already has them it's a custom order McMillian Pre-64 Supergrade magnum fill stock in 3-tone speckled granite. Fits me like a glove although I guess it fits my action like crap.
 
Most McMillans do require some fitting... Those pillars are hard to see, but that last pic I think I see one in there.

Does your action set in there too high or too low?
 
Looks good Jake. Wax the tar out of everything. I use Johnsons Paste Wax but there are a bunch of good ones available.
 
Well my kit came in a picked up some wax yesterday at the hardware store. I probably went a little overboard but we will find out.

I waxed everything that wasn't getting bedded. The action, filled all the pin holes bolt stop ejector, everything recoil lug rails tang. Then waxed everything I taped.

Then I went and applied release agent to everything I waxed then the floor plate, trigger guard and the whole inlet of the stock. I used a bunch of Q-Tips. This was after throughly reading the instructions twice and went back to them three times. So after all the prep work was complete I mixed up some Acraglas gel added one drop of brown dye to hopefully get an approximate match to my stock. After taking a spoon full of each and mixing it I thought I didn't have enough. So I doubled my batch. Well that was a mistake as I think if I had just done my initial batch would have been more than plenty. Oh well lesson learned.

So I carefully spread the epoxy into my stock and I thought I had done a decent job. Put a little on the tang and carefully slid the action in place put my screws and floor plate it and just snugged the screws. I used a little much. Just a little came out the tang but the recoil lug area was a mess. I had that stuff all over. So more Q-tips and WD-40 and the cleaning began. I finally got that all cleaned and I looked in the mag well and it looked like I had some epoxy there so I picked the rifle up and popped the floor plate and as I did I noticed some epoxy in the gas relief hole in the right side of the receiver. So I took my light and looked down the chamber and saw epoxy in the reciever lug recess. So after many many Q-Tips soaked in WD an about 45 minutes of swabbing I hope I got it all cleaned out.

So now the waiting game has begun. They say wait 10 hours but I'll be heading to work before I can pop it out so I get to fret all day at work tomorrow and hope when I come home it will pop out easily. Then hope the bolt will slide in and will turn.
 

Attachments

  • image.jpg
    image.jpg
    1 MB · Views: 1,364
  • image.jpg
    image.jpg
    1 MB · Views: 1,364
  • image.jpg
    image.jpg
    1.1 MB · Views: 1,364
  • image.jpg
    image.jpg
    1.1 MB · Views: 1,364
  • image.jpg
    image.jpg
    1.1 MB · Views: 1,364
  • image.jpg
    image.jpg
    1.2 MB · Views: 1,365
More pictures
 

Attachments

  • image.jpg
    image.jpg
    994.4 KB · Views: 1,364
  • image.jpg
    image.jpg
    1.1 MB · Views: 1,363
  • image.jpg
    image.jpg
    1.4 MB · Views: 1,363
  • image.jpg
    image.jpg
    1.2 MB · Views: 1,363
  • image.jpg
    image.jpg
    1.2 MB · Views: 1,363
  • image.jpg
    image.jpg
    1.1 MB · Views: 1,363
It'll be fine Jake. Don't sweat if you have small air pockets either. A little extra will fill them in as well.

Looks good. Your prep work and wax will let everything come apart.
 
Back
Top