Navigation
Install the app
How to install the app on iOS
Follow along with the video below to see how to install our site as a web app on your home screen.

Note: This feature currently requires accessing the site using the built-in Safari browser.
More options
You are using an out of date browser. It may not display this or other websites correctly.
You should upgrade or use an alternative browser.
You should upgrade or use an alternative browser.
Reloading bench design on a budget
- Thread starter Wis65x55
- Start date
Richracer1
Handloader
- May 12, 2005
- 2,137
- 114
I went the easy route. I went to Sam's Club and bought their heavy duty table. It comes with a 2" thick hard wood top and adjustable foot pads. I believe it goes for $200. It's working out really well. I have a Mec shotshell loader mounting plate, Forster Co-Ax press, Lee turret press and a brass trimmer mounted to it.
I just used srap 3/4" plywood and glued and screwed two layers together. It is sized to fit on my table saw and clamped down. Very portable and my press is bolted to the plywood. Stained and poly was added. It was basically free.
Alternatively you could pick up some old cabinets and countertops off Craigslist cheap. Menard's, home depot etc also sell countertop remnants very cheaply. I've made a woodworking top that also clamps to the tablesaw from that. Good luck with it.
Alternatively you could pick up some old cabinets and countertops off Craigslist cheap. Menard's, home depot etc also sell countertop remnants very cheaply. I've made a woodworking top that also clamps to the tablesaw from that. Good luck with it.
jimbires
Handloader
- Aug 16, 2011
- 3,151
- 1,855
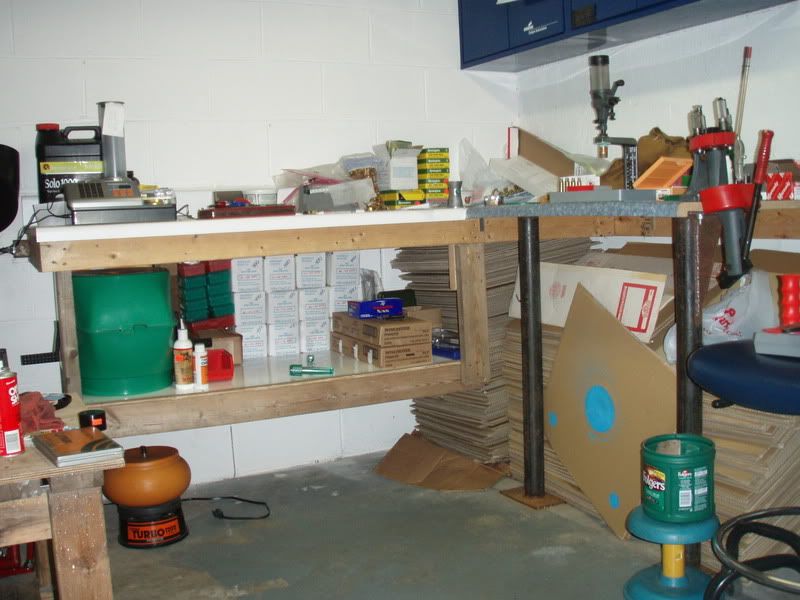
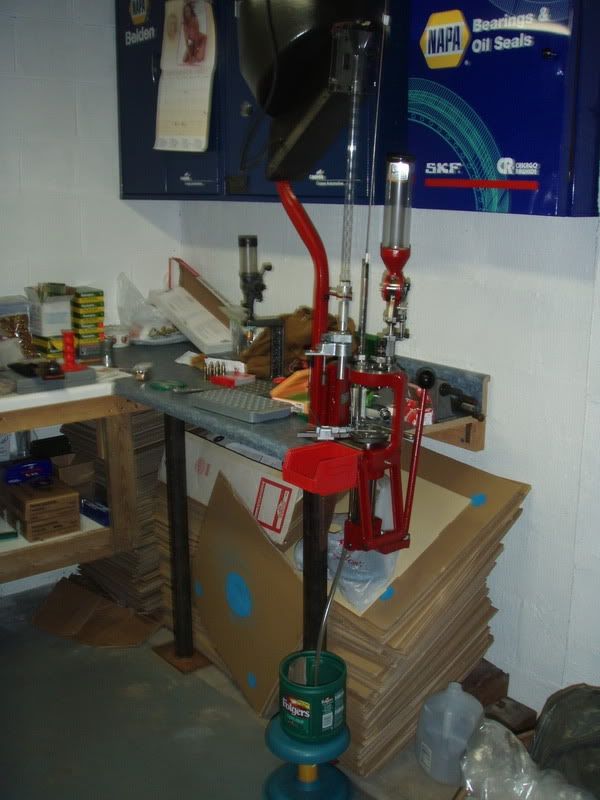
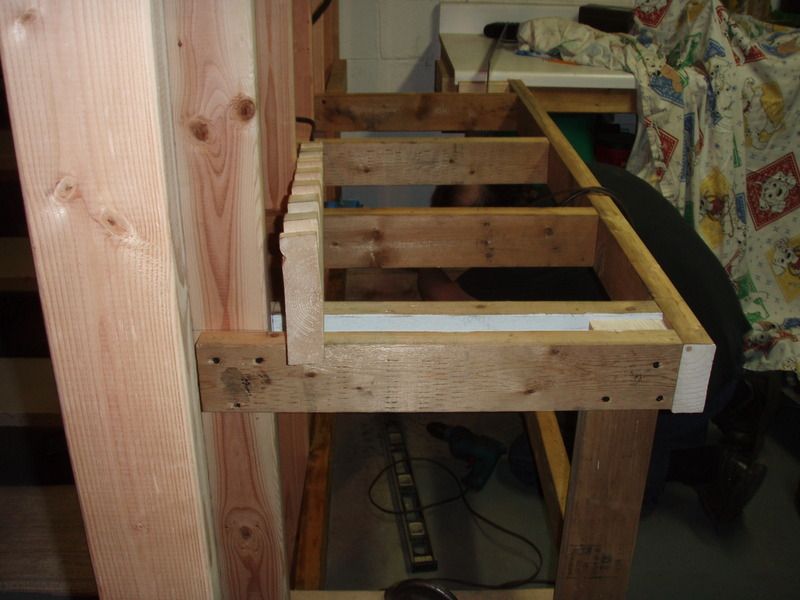
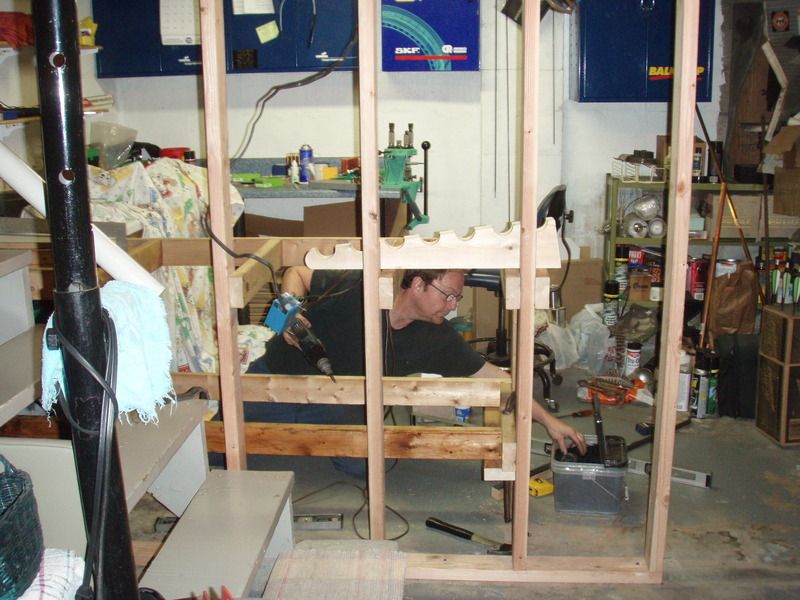
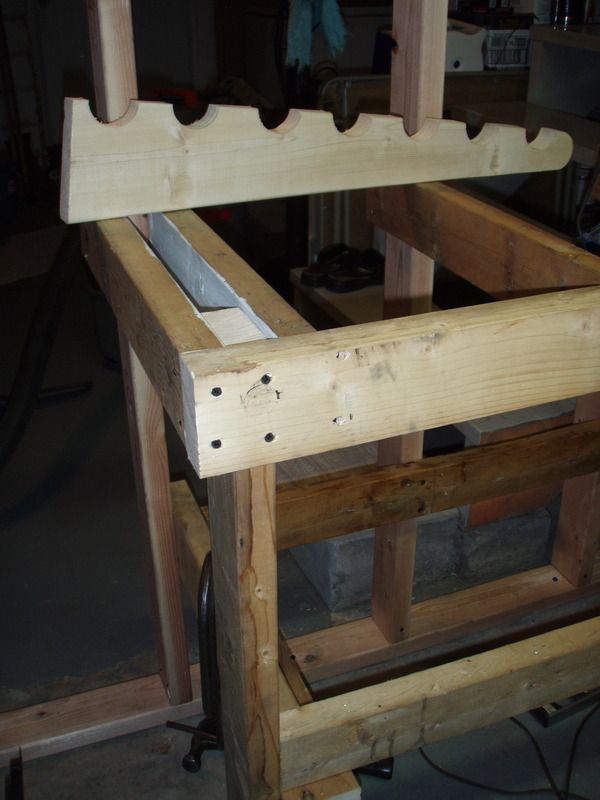
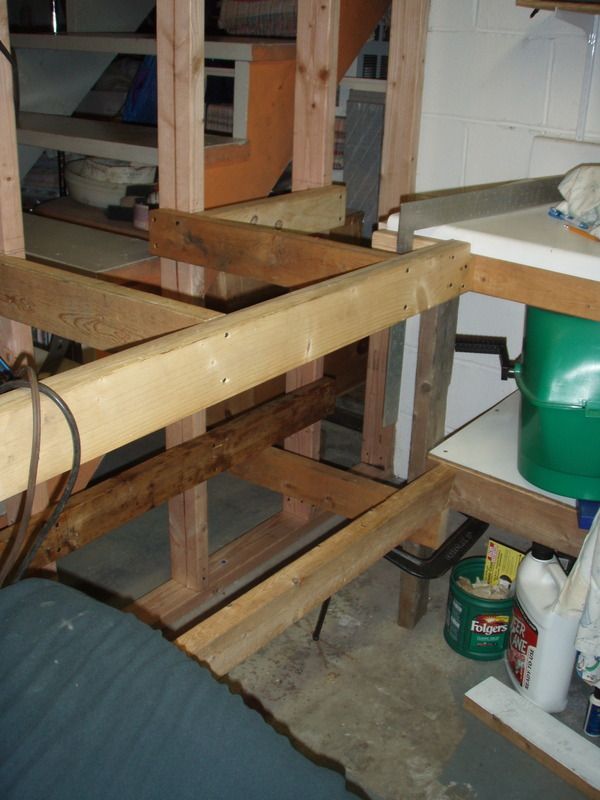
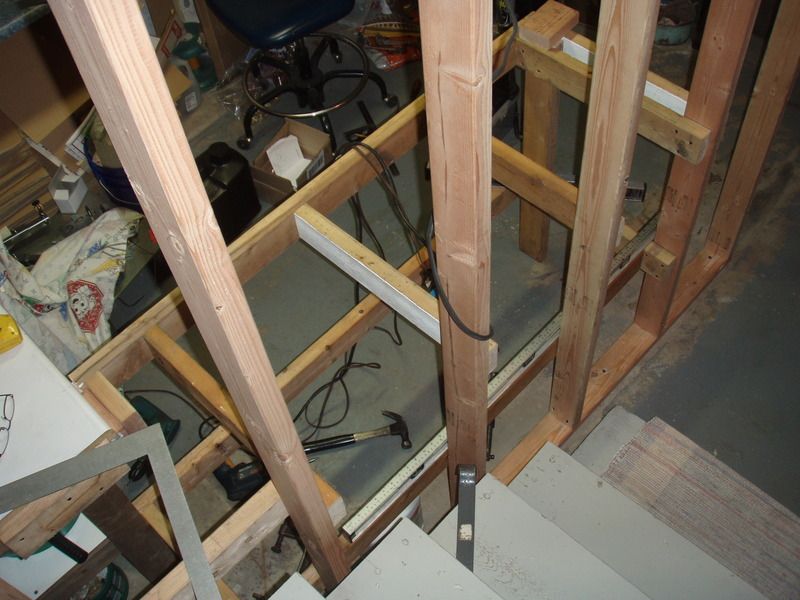
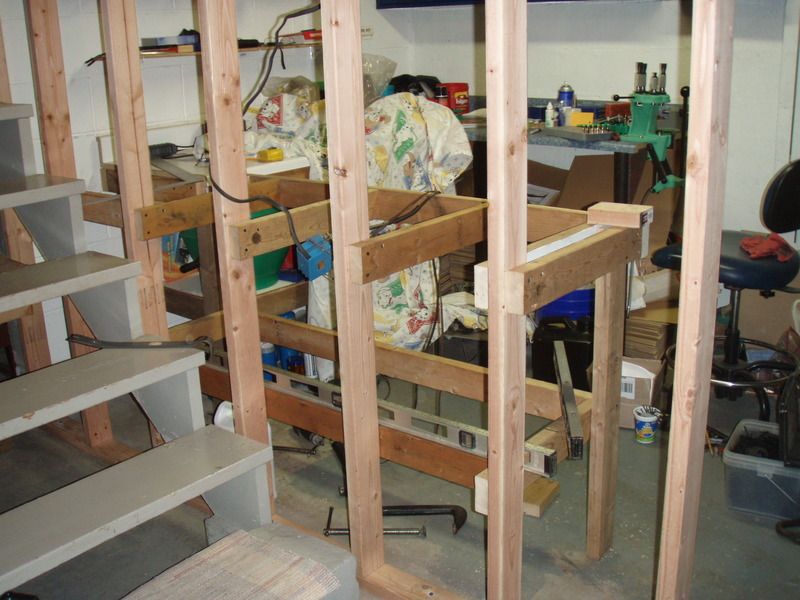
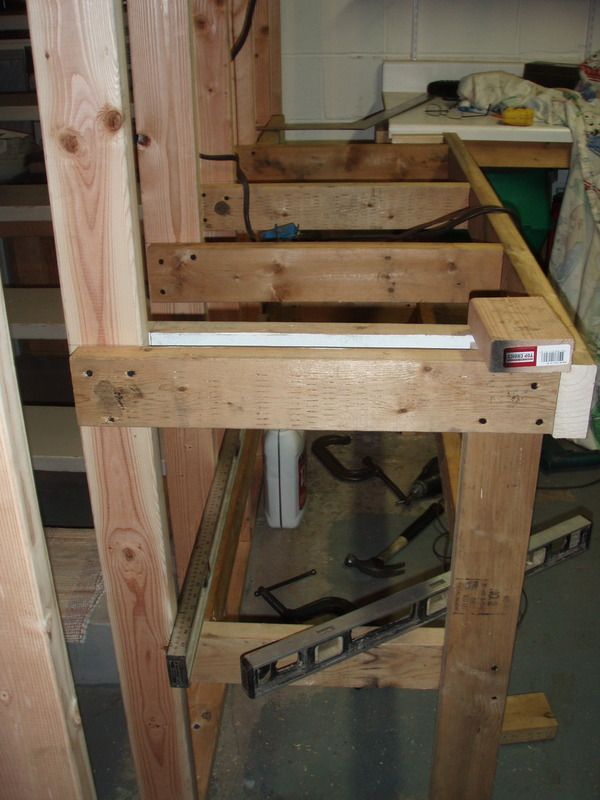
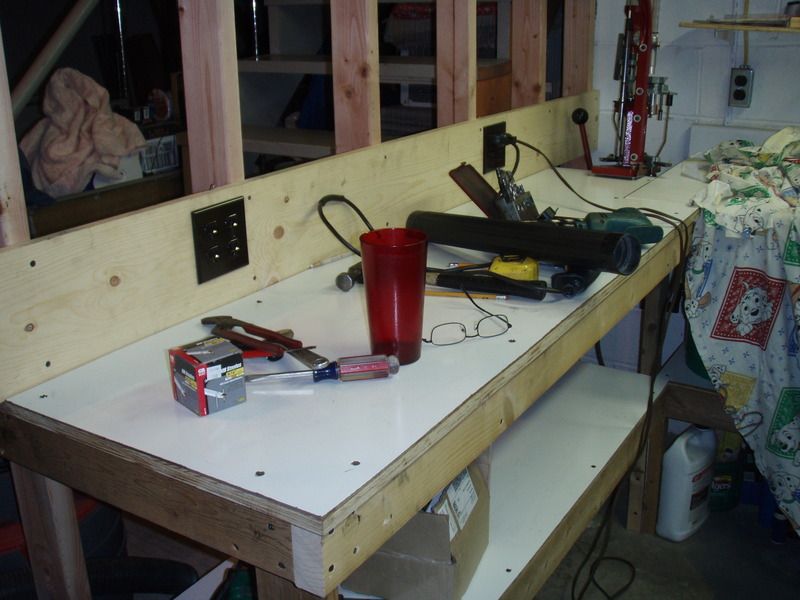
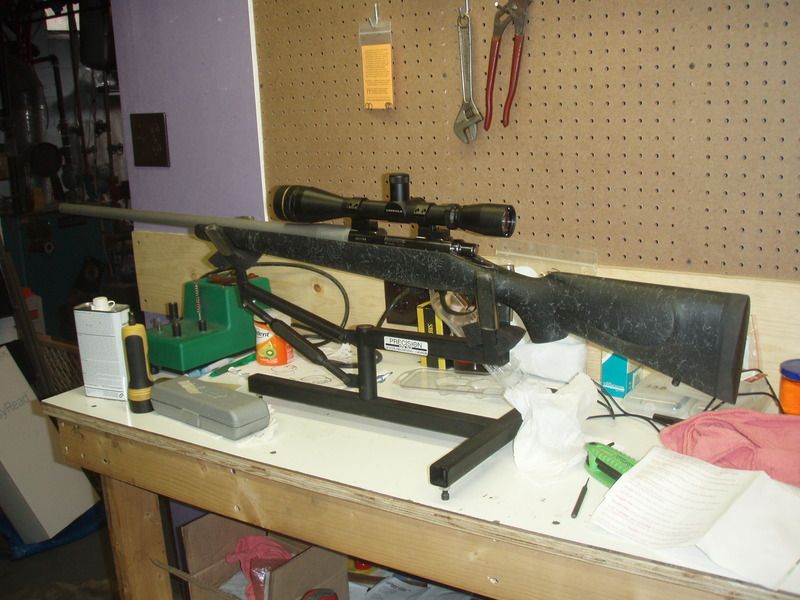
my reloading room has been outgrown a few times . maybe 2 or 3 years ago I built one more bench in there and took a few pics as I went . my basement is damp so it warps the paneling . so while I had the paneling taken off I built the bench . I put up drywall this time . I built the bench right into the studing of the wall . my benches are very solid .
this is my room with 2 benches . I used pipe table legs that are tap-con ( screwed ) to the floor . I mounted my press right over the one leg . it will mount all of my presses . I just tap-con a 2x4 to the block wall and used a counter top for the blue bench . I soon out grew it and added a second bench . since it doesn't get used hard I just used wood legs and tied it into the blue bench . it is also a counter top .
[URL=http://s106.photobucket.com/user/jimmyboy16866/media/reloading%20room/P1220435.jpg.html]
here are a few pics of my latest update , with the third bench .
tying it into the second bench .

put in a few outlets .
outer wall is up .
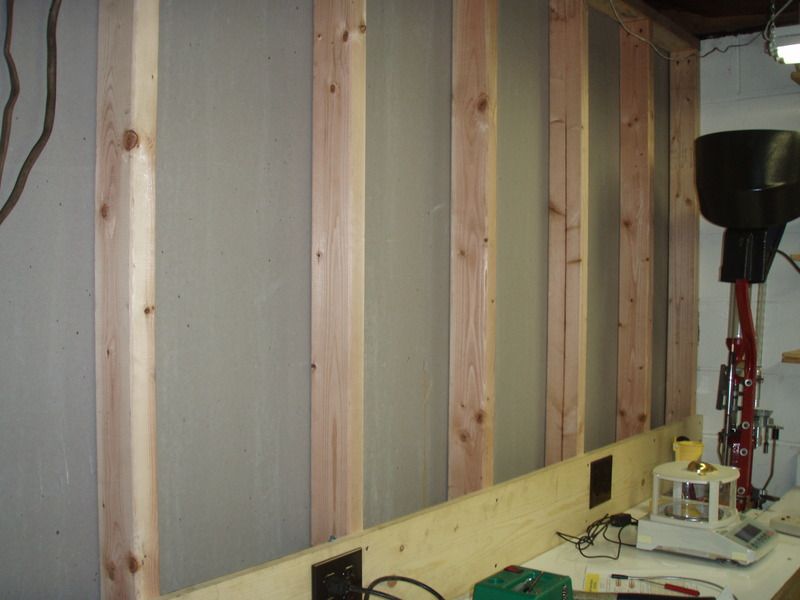
a pegboard over the new bench .
my advice is build it bigger than you think you'll need , and make it solid . put shelves under it , if you can . you'll eventually need the space .
this is my room with 2 benches . I used pipe table legs that are tap-con ( screwed ) to the floor . I mounted my press right over the one leg . it will mount all of my presses . I just tap-con a 2x4 to the block wall and used a counter top for the blue bench . I soon out grew it and added a second bench . since it doesn't get used hard I just used wood legs and tied it into the blue bench . it is also a counter top .


[URL=http://s106.photobucket.com/user/jimmyboy16866/media/reloading%20room/P1220435.jpg.html]
here are a few pics of my latest update , with the third bench .


tying it into the second bench .


put in a few outlets .

outer wall is up .

a pegboard over the new bench .

my advice is build it bigger than you think you'll need , and make it solid . put shelves under it , if you can . you'll eventually need the space .
joelkdouglas
Handloader
- Jun 5, 2011
- 1,310
- 3
Keith, my bench is below:
I went to Home Depot or Lowe's, can't remember which, and found a big flat solid wood piece. That became the top of the bench. Everything else you see is 2x4s. I attached the top to the 2x4s with carriage bolts, and used long wood screws otherwise. You could make it really heavy and sturdy by lining the area underneath the solid wood piece with 2x4s laid up and down, but as I move so much I didn't want it that heavy.
I did spend a pretty good amount of time sanding and rubbing on some tung oil, because I didn't want any splinters. She's held up to four cross country moves and a myriad of projects.
- Thread starter
- #7
truck driver
Ammo Smith
- Mar 11, 2013
- 7,207
- 740
I started out with an old oak wash stand that was my clothes dresser when I was a child and it was gifted to me when I married and left home. It was pretty beat up and I took 1/2 an old kitchen table top and bolted that on top and still have it but use it as a work bench since I took a home made counter/table and converted it into my primary bench which I have lag bolted to the studs in my basement wall. I have 3 reloading presses on it right now. I also have a drafting lay out table I have my lead bullet sizer mounted on a shot shell press and a Dillon Square deal mounted on it. I just remodeled the kitchen and took the cabinets and counter top and put it around the wall for storage and more work bench space.
You can never have enough storage or work space. My reloading area is also my do it all room and work on my guns there as well as other projects and it stores all my wood working tools along with my reloading and fishing equipment. It would be nice to have a garage. :mrgreen:
You can never have enough storage or work space. My reloading area is also my do it all room and work on my guns there as well as other projects and it stores all my wood working tools along with my reloading and fishing equipment. It would be nice to have a garage. :mrgreen:
Guy Miner
Master Loader
- Apr 6, 2006
- 17,503
- 4,720
Couple of hundred bucks at Home Depot or other hardware stores. I think it was $160 when I got it 10+ years ago. It's been a great loading bench. Easy to assemble.
Guy

Guy
wisconsinteacher
Handloader
- Dec 2, 2010
- 1,973
- 282
Contact local school districts to see if they ever have old teacher desks for sale. I got mine for $10. It is solid wood an is a beast. It was from a local private school.
baltz526
Handloader
- Sep 25, 2005
- 1,074
- 8
Go down to your local Restore or whatever the used building material store is called near you. Buy a solid core door. Build a frame out of 2x4/2x2. add one shelf under the top. Buy a few plastic bins for on the floor. Frame the shelf to fit the bins.
Wyo7200
Handloader
- Aug 20, 2014
- 565
- 0
There's a product called 2x4 workbench that provides you with the four legs and some shelving molds for $50 or so on Amazon. You get the 2x4 wood and plywood (I used a prefabricated butcher block table top from menard's) as big as you need it and build it to the size you want. Very easy to put together.

1100 Remington Man
Handloader
- May 1, 2007
- 1,151
- 295
- Thread starter
- #14
jimbires
Handloader
- Aug 16, 2011
- 3,151
- 1,855
mine is 36" high . I used counter tops for part of my bench , these are 24" deep . my last addition to the bench is , I think , 18" deep . I used plywood that I had . I'm sure not calling these specs ideal , but seem to be very usable . if you use a stool while loading , take the stool height into consideration .
i rent so decided to build a table:
left corner powder throw, middle has scale, the shell tray/block, then the press on the other corner
on the back side there is a vice on one corner and the case trimmer on the other corner and books/primers/handtools can sit in the middle, or clear off a section and use the space around the vice to disassemble and clean a rifle if needed.
mine was all rough cut hemlock 4x4 legs and lots of bracing with the top being 2" thick (or more, don't remember)
After remodeling two bathrooms in a house I lived in a number of years ago I kept the 2 1/2' wide sink cabinets. I placed them one on one end and one on the other end 8 feet apart leaving a 3 foot space between them. I screwed 2x4s that were 8 feet long on front and back sides at the top to connect them together. I then took a sheet of 1/2" plywood and ripped it into length wise and stacked them on top of each other making a table top 8 feet long 2 feet wide 1 inch thick. I screwed this top down onto the 2x4s that connected the cabinets together. Makes a good sturdy loading bench what you can mount your press etc. in the open space in the middle and have storage space in the cabinets and other work space on each end over the cabinets. I have a couple of 2 1/2' wide by 3' tall shelves that I place over the cabinets. One holds my loading dies and tools and the other holds my boxes of bullets grouped by caliber. I leave my rife/pistol loading press bolted on the far right of my open space and my RCBS powder measure attached on the far left of the open space that way I have the middle for my scale and work area. I mounted my shotgun MEC Jr. loader to a 1/2" about 6"x6" board that I can use C-clamps to clamp it in this middle space when I need shotgun ammo loaded and then remove it. I also use an old refrigerator (unplugged) that was in my house when I bought it as my powder locker. I put powder in the main compartment and my primers in the freezer compartment. Moisture resistant, fire resistant but in case of a fire that might get hot enough for the things to want to cook off the pressure would just pop the doors open and not explode. Cost less than $30 or there about.
Depends on what you need. A 2x6 frame tied directly to wall framing in your house will be most secure. Simply screw a 2x6 of desired length into the framing at level minus 1 1/2" desired total height. Set Joist hangers on either end with 2x6. If your total length is more than 4' I would add a center joist and vertical support with hanger for every 3 feet. A vertical 2x6 leg at either corner for support, toenailed to subfloor or if cement flooring, set in a post footing secured with liquid nails, and 2x6 decking run the long way. A corner brace about 12" long to the short angles long and short way at the vertical supports will add stability if necessary Tie this in to the verticals and joists. You can face the top with a linoleum remnant upside down for easy cleanup. This is an approximation of the garage bench plan on which I perform heavier tasks than reloading ammo.
Probably #20 worth of lumber, screws and hangers in the whole works.
If you need a fully portable bench, you can follow the same basic framing adding 4 vertical supports and a 2x4 rim joist instead of hangers to a wall plate. You will need cross bracing under your decking (2x4) will suffice and you'll need at least 4 corner braces. Basically build a rectangle box out of 2x4 at desired finished dimension, then add 2x6 verticals to the inside corners, screwing into both joist boards, then adding your cross bracing at a 45 degree angle across the corners, screwed to decking and outer joist. Be sure to cross measure your rectangle before scribing, cutting and fastening cross bracing. Measurement from corner aXc should equal bXd. Wiggle it until they do, then you are square. Don't know what you have for tools and skills, I would miter in the legs so they match the angle of the cross bracing and add a mitered cross tie between them at convenient footrest level to add stability, but then I like playing with woodwork.
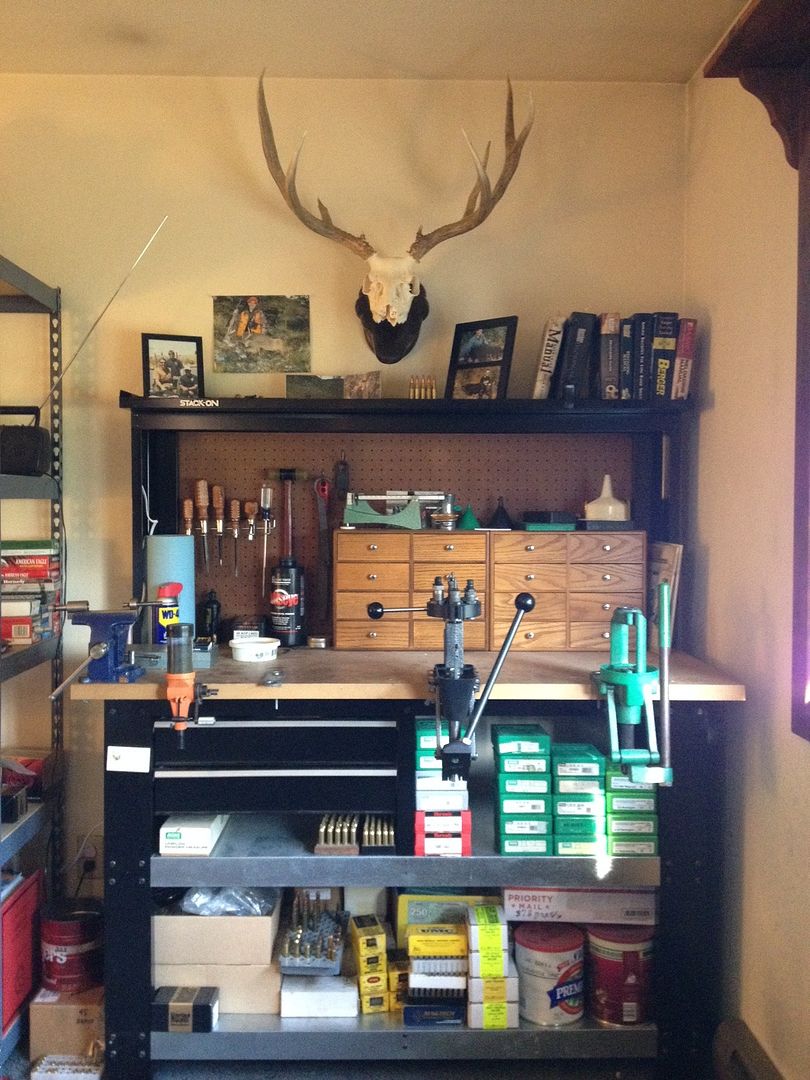
.JPG") Bench height is determined by your desire to sit or stand. I've done both. I prefer a standing height with tall bar stools if I feel like sitting. If you plan on staying put attach it to the wall and you'll be able to forgo the back legs. The bench pictured cost less tan 250$ three years ago. The bookcases were garage sale refugees for 5$. It's 3'x12". It's not nearly so neat at the moment :grin: .
Bench height is determined by your desire to sit or stand. I've done both. I prefer a standing height with tall bar stools if I feel like sitting. If you plan on staying put attach it to the wall and you'll be able to forgo the back legs. The bench pictured cost less tan 250$ three years ago. The bookcases were garage sale refugees for 5$. It's 3'x12". It's not nearly so neat at the moment :grin: .Scott
You guys have some really nice benches and loading spaces. If you have the space, a dedicated area would be the way to go.
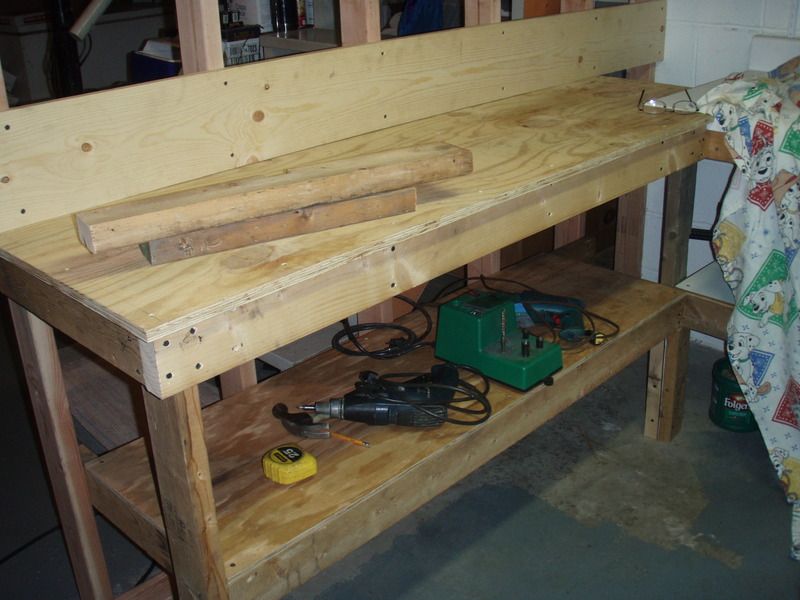
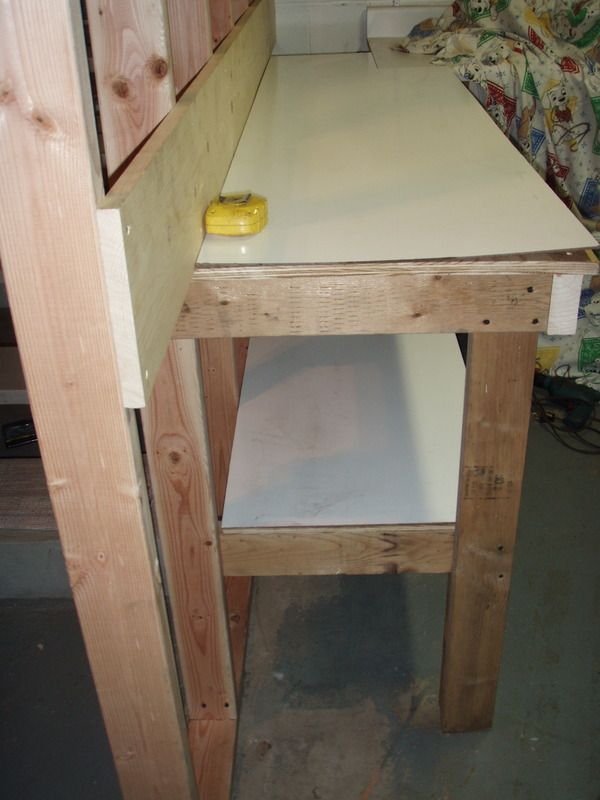
Mine has always been a portable affair that bolted or clamped to a table saw in the garage. 2 layers of 3/4" plywood glued and screwed together. My RCBS press is bolted in the middle with room on the side for a secondary press, and room for scale and powder thrower on the other side. It's a bit cramped, but it works. If I shot/loaded more, I'd definitely want a more comfortable space that was more permanent in nature.
Mine has always been a portable affair that bolted or clamped to a table saw in the garage. 2 layers of 3/4" plywood glued and screwed together. My RCBS press is bolted in the middle with room on the side for a secondary press, and room for scale and powder thrower on the other side. It's a bit cramped, but it works. If I shot/loaded more, I'd definitely want a more comfortable space that was more permanent in nature.