Am I looking at incipient case head separation ?

fightthenoise":395d8ttt said:
ShadeTree":395d8ttt said:
I also agree with several on here that are thinking it's possibly a scratch......doesn't quite look right for separation, including it's a little far down the case, but it doesn't take long to be safe and check to be sure.

Agreed. Also for the record I did all my measurements above on a full length sized case because I don’t keep any factory ammo on hand. Could the die reflect the excess head space or is it definitely the chamber? I was thinking of just buying a no-go gauge but it’s such a one time tool for a caliber I only plan to have one of.


Sent from my iPhone using Tapatalk

Depends on how you set up your FL die. If it’s screwed down too far it creates more head space.

You can rent a go/no go from 4D Reamer Rentals. I’ve had good luck with his stuff and the rates are reasonable. I’ll bet a dollar to a dog turd that your headspace is good though. [emoji1]
 
Thanks for all your help fellas. I’m just gonna keep shooting them and keep an eye on things as usual. If I get a case cut open I’ll post a picture for the curious but I’m on the road the next few days so it won’t be soon.


Sent from my iPhone using Tapatalk
 
fightthenoise":2rz0i45l said:
ShadeTree":2rz0i45l said:
I also agree with several on here that are thinking it's possibly a scratch......doesn't quite look right for separation, including it's a little far down the case, but it doesn't take long to be safe and check to be sure.

Agreed. Also for the record I did all my measurements above on a full length sized case because I don’t keep any factory ammo on hand. Could the die reflect the excess head space or is it definitely the chamber? I was thinking of just buying a no-go gauge but it’s such a one time tool for a caliber I only plan to have one of.


Sent from my iPhone using Tapatalk

In practice headspace is to stay within specs so any factory cartridge is safe to shoot in any factory chamber that is within specs. Both sides are covered....the rifle manufacture knows that any factory cartridge is safe in their chamber, and vice versa.


Like GB mentioned, to you the reloader, it's just a number that you can adapt to and minimize. On fired brass instead of running your die all the way down, adjust your die to your chamber by barely bumping the shoulder back. On new brass if it shows a lot more slop than what you're comfortable with there are 2 common ways to minimize stretch on the first firing. Necking up then partially sizing the neck back down to create a false shoulder to headspace off of, the other is jamming the bullet into the lands. Both ways minimize cartridge headspace while it blows out the shoulder. Both methods are fairly simple but like all things reloading, DON'T do either until you've read enough to understand it.
 
gbflyer":35qe8r5x said:
fightthenoise":35qe8r5x said:
ShadeTree":35qe8r5x said:
I also agree with several on here that are thinking it's possibly a scratch......doesn't quite look right for separation, including it's a little far down the case, but it doesn't take long to be safe and check to be sure.

Agreed. Also for the record I did all my measurements above on a full length sized case because I don’t keep any factory ammo on hand. Could the die reflect the excess head space or is it definitely the chamber? I was thinking of just buying a no-go gauge but it’s such a one time tool for a caliber I only plan to have one of.


Sent from my iPhone using Tapatalk

Depends on how you set up your FL die. If it’s screwed down too far it creates more head space.

You can rent a go/no go from 4D Reamer Rentals. I’ve had good luck with his stuff and the rates are reasonable. I’ll bet a dollar to a dog turd that your headspace is good though. [emoji1]

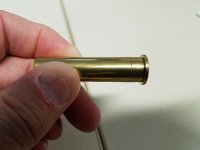
I bet it is too. A minimal sized case will be safe to shoot in a maximum sized chamber, always will be. But not continued firings at that. At some point the case gets tired of stretching and says no mas.


My 8x87 would not begin to close the bolt on a .004 piece of tape with new brass ran though a FL sizer turned all the way down. That told me I could size all of them at that and be good to go. My 22-250 told me I needed to make a false shoulder for the first firing unless I wanted to be done with brass in short order. These were both sporterized mauser rifles. If they're used or been worked on, I check them all.
 
bdbrown66":jktvthgy said:
FWIW, this is incipient case head separation, in a .45-70.

Ah yeah that looks like a jagged crack. Mine is a perfectly strait ring.


Sent from my iPhone using Tapatalk
 
keep in mind he is only neck sizing . so after 2 or 3 reloading cycles the brass should be fully expanded . there is no wondering how he has the die adjusted for body sizing . neck sizing only would be .000 shoulder bump .
 
jimbires":1e8jomfe said:
keep in mind he is only neck sizing . so after 2 or 3 reloading cycles the brass should be fully expanded . there is no wondering how he has the die adjusted for body sizing . neck sizing only would be .000 shoulder bump .

You are correct. The checking headspace thing kind of got the original post sidetracked. That neck sizing only was some of the puzzling part on the original post, combined with what some others have pointed out, it does point to more than likely a scratch.
 
Get one of those little magnetic LED lamp on a flexible stalk flashlights. Shine it down in the case from different angles. You will always see a pronounced shadow ring from case stretch before you can feel anything with wire or a paper clip. I get consistent scratches from my cartridge box holder grid from bouncing down these Wyoming roads. Regardless of source, I think they are scratches.
My 2 cents' worth,,,, EE2
 
bdbrown66":ir60bbg6 said:
FWIW, this is incipient case head separation, in a .45-70.


YUP- that there is it. Notice that the "line" is not as straight and even as the line on your cases. Looks like a machining mark or ring in the chamber, in my uneducated opinion. CL
 
cloverleaf":2xi9cgdz said:
bdbrown66":2xi9cgdz said:
FWIW, this is incipient case head separation, in a .45-70.


YUP- that there is it. Notice that the "line" is not as straight and even as the line on your cases. Looks like a machining mark or ring in your chamber, in my uneducated opinion. CL
 
Scratch or stretch??? We want to know..... I wouldn't go crazy with measuring chamber, cases or anything until determined what the "line" really is.
EE2
 
elkeater2":30fj5uni said:
Get one of those little magnetic LED lamp on a flexible stalk flashlights. Shine it down in the case from different angles. You will always see a pronounced shadow ring from case stretch before you can feel anything with wire or a paper clip. I get consistent scratches from my cartridge box holder grid from bouncing down these Wyoming roads. Regardless of source, I think they are scratches.
My 2 cents' worth,,,, EE2


Good info to know, I'll have to try it. I can feel a slight catch or jump on some cases I've checked with the bent wire method that I've suspected were stretched thin, but it's tricky.
 
"I get consistent scratches from my cartridge box holder grid from bouncing down these Wyoming roads. Regardless of source, I think they are scratches.
My 2 cents' worth,,,, EE2"

"YUP- that there is it. Notice that the "line" is not as straight and even as the line on your cases. Looks like a machining mark or ring in the chamber, in my uneducated opinion. CL"

Just my opinion but I think it's one of these two ideas with my choice edging toward Clover Leaf's thought. The line appears to be too sharp and deliniated to be rubs from a cartridge box. I get similar marks from my plastic cartridge boxed but they're nowhere near as sharp. The OP's picture looks like the scratch was made with a scribe. Anyway, my best guess is one of the two mentioned.

This is how I set up my sizing die for bottleneck cartridges. You would do this with both full length sizing dies and neck sixing dies.

1. Take a once fired factory round and blacken the neck and shoulders with a Magic Marker or Sharpee pen. Some people like to smoke the neck and shoulder, but I find the Magic Marker/Sharpee pen a bit better.

2. Carefully lubricate the case.

3. Loosen the lock ring on the sizing die and back off about two turns from when the die is set to touch the shell holder.

4. Size the case. Note where the marks are on the case and turn the die down about a half a turn and size again. Turn down some more, and resize again. What you are looking for is the marks on the blackening just touching the shoulder.

5. Clean the lube from the case and try it in the rifle. It may chamber just a bit on the snug side. If so, turn the die down ever so slightly, lube and size again. Wipe off the lube and try in the rifle. If it slides in as easily as a factory round, you should be good to go. If not, usually one more very slight adjustment should fix the problem.

6. Tighten the locking ring for the die and you're done. You have just set your sizing die up for a custom fit to your specific rifle, rather than a generic one size fits all guns.

Paul B.
 
PJGunner":1dx15139 said:
"I get consistent scratches from my cartridge box holder grid from bouncing down these Wyoming roads. Regardless of source, I think they are scratches.
My 2 cents' worth,,,, EE2"

"YUP- that there is it. Notice that the "line" is not as straight and even as the line on your cases. Looks like a machining mark or ring in the chamber, in my uneducated opinion. CL"

Just my opinion but I think it's one of these two ideas with my choice edging toward Clover Leaf's thought. The line appears to be too sharp and deliniated to be rubs from a cartridge box. I get similar marks from my plastic cartridge boxed but they're nowhere near as sharp. The OP's picture looks like the scratch was made with a scribe. Anyway, my best guess is one of the two mentioned.

This is how I set up my sizing die for bottleneck cartridges. You would do this with both full length sizing dies and neck sixing dies.

1. Take a once fired factory round and blacken the neck and shoulders with a Magic Marker or Sharpee pen. Some people like to smoke the neck and shoulder, but I find the Magic Marker/Sharpee pen a bit better.

2. Carefully lubricate the case.

3. Loosen the lock ring on the sizing die and back off about two turns from when the die is set to touch the shell holder.

4. Size the case. Note where the marks are on the case and turn the die down about a half a turn and size again. Turn down some more, and resize again. What you are looking for is the marks on the blackening just touching the shoulder.

5. Clean the lube from the case and try it in the rifle. It may chamber just a bit on the snug side. If so, turn the die down ever so slightly, lube and size again. Wipe off the lube and try in the rifle. If it slides in as easily as a factory round, you should be good to go. If not, usually one more very slight adjustment should fix the problem.

6. Tighten the locking ring for the die and you're done. You have just set your sizing die up for a custom fit to your specific rifle, rather than a generic one size fits all guns.

Paul B.

Awesome. Thanks for this Paul. I’ll set this up tomorrow.


Sent from my iPhone using Tapatalk
 
take 1 case and punch the neck out to 30 cal with a 30/06, 308 die. screw your 280 sizer up a ways, lube your case and resize it a bit, when you get close, keep an eye on the neck/shoulder junction, try to chamber it, keep trying and resizing until the bolt goes closed with just a bit of resistance. then screw your die down 1/16th turn and lock it down. after a few firings you may have to screw the die down to bump the shoulders back about .002, this way your running minimum headspace and cases last longer.
RR
 
Great sizing die adjustment instructions here. I still want to know what the OP's cases are showing - scratches or actual stretch marks. Another thing I do is take a rotary tool (Dremel) with a cutting wheel and section a case lengthwise. Nothing like seeing the inside. I have found a lot of stretching that didn't show anything on the outside a couple times. I even found a batch of WW 7-08 cases that had the flashhhole tapered from the inside - even though other WW 7-08 cases did not.
 
fightthenoise . . . . .
Case head separations only occur for one reason. It can only happen when the shoulder of any rifle case is pushed back too far.

- That causes a case to stretch too far when fired.
- The brass is then thinned considerably (and hardened).
- The case will then crack around the pressure ring.

Your cases show a totally different problem. The shiny line around your cases was due to a very minor surface imperfection in your chamber. It can easily be refinished.

Those marks on your cases are located about 3/8" above where case head separations can occur. Accurately setting the height of your sizing die insures that you will NEVER see a case head separation.
 
fightthenoise":3kinnp67 said:
I’ve never fired a batch of brass enough to wear it out so I just want to confirm what I’m looking at. This brass has always been neck sized. Less than five firings. What do y’all think?

d9f4386f30089b7b759d3f2364c3096c.jpg


Sent from my iPhone using Tapatalk

First, from the picture, the "Ring" is far to high up the case.
Look farther down, where the colour changes about 1/4" above the base, THAT is where the brass stretches and separates

Then you post THIS:
fightthenoise":3kinnp67 said:
I haven’t bumped the shoulder and only full sized them for the first firing. ...
Sent from my iPhone using Tapatalk

Now, WHY would you full size NEW brass? New brass is already at the minimum most times, and if you full length size, you move brass from the base area up to the shoulders, and this is even BEFORE the first firing.
Full length sizing NEW brass is very harmful to the brass. and can lead to premature head separation, more than any other practice.

new brass NEVER needs full length sizing, perhaps neck sizing to straighten up the mouth, but that's it.

Best practice is to fireform with a false shoulder, or a LONG seated bullet that jams into the lands, and a medium load.
Better yet, and cheaper is the false shoulder located as described above, and 10% case capacity full of Bullseye, topped off with COW, and fired straight up.
For a sloppy chamber, wrap a piece of celophane tape around the base to center it in the chamber, then when crushed against the false shoulder, you have a perfectly fireformed cartridge.
 
Back
Top