Making of My 375 Wby

RL338

Handloader
Mar 23, 2017
3,451
5,659
I would like to share my step by step process of bringing it to life. Maybe it will give some confidence of doing their own project.
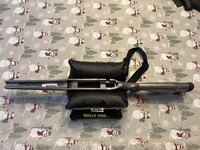
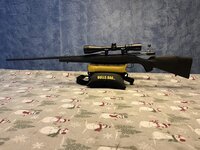
The donor Weatherby Vanguard chambered in 300 Win Mag.
EBE4D482-A296-43C5-BC24-1A9B9847F66D.jpeg
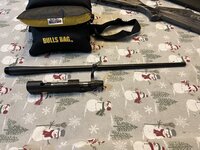
Next a complete disassembly to remove the barrel.
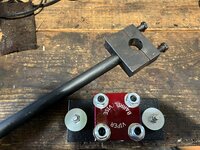
1422F1D2-A2C4-42B0-82F7-4C62F6E3D76A.jpegACDE58B7-35F6-40EC-A06F-853CF2B84AE8.jpeg
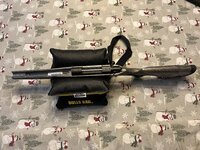
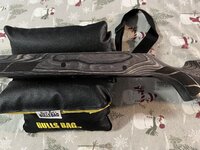
The stock I purchased was a Wby laminated take off that the front lug was already bedded. Action fits tight in it.
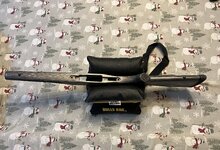
22BD814C-F24B-4B08-9D08-6F5A9AA6FEA6.jpeg434864C0-6AE0-499E-9BB9-125BC2986A75.jpeg263E47A9-A916-4324-B727-8F6EF31BBCB0.jpeg
Now I’m waiting for the barrel to arrive.
 
Great tutorial. Very cool that you are doing the work yourself. Looking forward to seeing the completed project.

JD338
 
The 375 Wby intrigued me.
Supposed to be the same ballistics as the H&H AI, which I have shot, and found the recoil to be manageable in a Ruger No.1.
Sounds like a fun project!
Enjoy when you get it built and get to shoot and hunt with it!
Note - make sure you install crossbolts to give the stock and barreled action the extra security and protection it will need...or you may find that the recoil will split the stock in the wrist where the tang hammers it during recoil.

I would have built one, but was experiencing shoulder issues at the time and decided to build the 376 Steyr instead. Less performance, but also less recoil for a bad shoulder to deal with. It is a pussycat to shoot off the bench with the 260 gr AB loads at 2632 fps.
 
Note - make sure you install crossbolts to give the stock and barreled action the extra security and protection it will need...or you may find that the recoil will split the stock in the wrist where the tang hammers it during recoil.
There is some sort of crossbolt installed in it already.
E3A69180-469D-43E5-B75C-C79C47533205.jpeg
 
This is going to be a great project. I think the 375 Wby/375 Improved is a pretty cool round. The 375 H&H Mag shoots pretty flat for what it is, turbo charging it will only make it better.

JD338
 
This is going to be a great project. I think the 375 Wby/375 Improved is a pretty cool round. The 375 H&H Mag shoots pretty flat for what it is, turbo charging it will only make it better.

JD338
I remember reading the ballistics charts & numbers for the 375 H&H long ago and then reading what gun - writers said about it having a trajectory similar to that of the 308 Win or 30-06... With the right bullets & load, that is quite true!

The first game I took with mine was in 2010, a black bear on a spot & stalk hunt here in Washington. A single 260 grain Nosler Ballistic Tip at 306 yards did the trick. :)

The 375 Wby should be even better.

Guy
 
One question. The .375 Weatherby is as long as the H&H. The .300 Win. Mag. is designed for use in a 30-06 length action. How do you plan to make the .300 mag. magazine long enough to accommodate the Weatherby cartridge?
I know a Remington M700 action is long enough to take a 375 H&H round as is on their 30-06 length action but I'm not familiar with the Weatherby Vanguard or its magazine box length.

Sounds like it'll be a nice gun when finished.
Paul B.
 
I'm not familiar with the Weatherby Vanguard or its magazine box length.
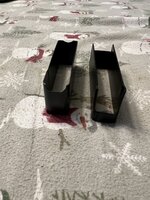
The box measures 3.526” which is a little short. I overcame this by making a modified box and a small tweak to the stock to get 3.600” to feed. I did not want to modify the receiver in any way. Weatherby did offer the 375 H&H in the Vanguard , don’t know how one loads rounds in the mag.
While doing this I discovered I can’t mag feed my 300 Wby loaded to Barnes data. Barnes shows 3.560” and that is what I loaded them. To be honest I’ve never hunted with more than 1 round in the rifle. I instead use MTM folding ammo carriers to carry extra rounds.
 
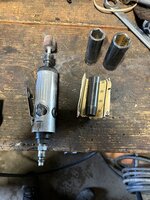
A little update. Barrel showed up but no headspace gauge yet. Should be here today or tomorrow. Last night I spun the barrel on the receiver to get an idea of how much the barrel channel needs opening. Well a lot , used a die grinder with a sanding drum to remove a large amount of material. Then deep well sockets with sanding paper for the final approach. I used 3 different diameter sockets to correspond with the barrel diameter and a lot of elbow grease. After I headspace the barrel and ready to install for good I will check to see if I need to take a little more off , then seal it up with a clear coat.
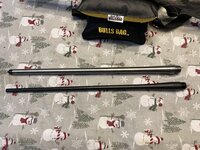
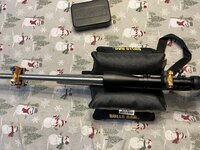
My new barrel next to the original.
IMG_3299.jpegIMG_3298.jpeg
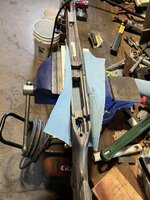
Stock getting worked on and my high tech channeling equipment.
IMG_3301.jpegIMG_3300.jpeg
 
Boy I’m forgetful , I forgot to take several pictures. Headspace (Go) gauge was in the mailbox today. So I progressed on with setting the barrel and installing stock and scope.
When you focus on the project at hand , one loses track of taking important picture for documenting this.
IMG_3303.jpeg
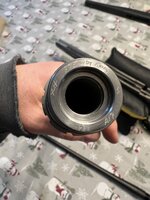
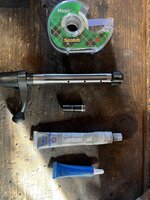
Items I used for setting the barrel. Anti-seize is for for the tenon threads. The red lock tight is for the barrel nut. I have a vision of multiple barrels on this receiver. Lock tightening the nut will allow me to use a rear entry action wrench to take the barrel on and off without disturbing the headspace , hopefully. Scotch tape and gauge to set headspace.
IMG_3305.jpeg
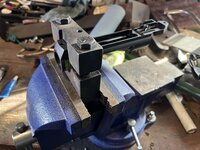
I clamp action wrench in vise with receiver tightened in it. Here’s where I forgot to take pictures. I anti -seized the tenon threads and put red lock tight on the barrel nut threads. Spun the locking nut onto its threads and spun barrel into action. Shilen’s barrels have 2 sets of threads with this setup. Then put headspace gauge into chamber and closed the bolt on it. Proceeded to thread barrel on until it bumped into the gauge. Next I backed barrel just off the gauge and slid the Savage barrel nut wrench down the barrel and torqued it to 60 ft/lbs. Cycled the bolt with gauge , good to go onto my next step.

IMG_3306.jpeg
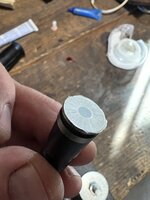
I put a piece of Scotch tape on the Go gauge , I trimmed it clean after I took the picture. The put the gauge back in the chamber and no go on bolt closing. We’re all set now.
For wandering minds my modified mag box on the right.
IMG_3214.jpeg
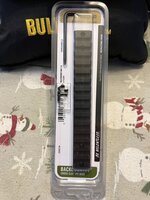
I installed the mod box and barreled action into the stock and added a Leupold pic rail.
IMG_3307.jpeg
I’m using the rings and scope that came with the rifle for now.
Leveled the scope with the Wheeler kit.
IMG_3309.jpeg
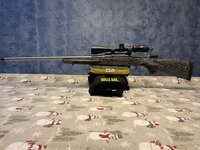
Picture of rifle as of now.
IMG_3310.jpeg
I have a few things to do it. One can notice the black electrical tape on end of barrel. It’s protecting the threads until my brake arrives. I still have to clear coat the inside of stock when weather warms up. Up next is sizing the basic brass to fit the chamber.
Again I’m sorry for some important missing photos.
 
Nice work! You are in the home stretch.
Won't be long now.

JD338
 
Back
Top