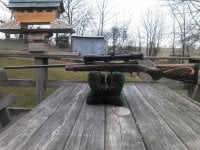
First Time Pillar Bedding M70 Part 1 (Long Post)

truck driver

Ammo Smith
Mar 11, 2013
7,304
845
I got all the parts I needed to pillar bed the new Boyd's stock I bought for the M70 7RM I picked up back in the fall. Though I have bedded several rifles many years ago pillar bedding is a new experience for me and since I no longer have access to a mill or drill press it will be done with hand tools I have around the house.
The materials consist of Devcon 10110 and Ernies Bed Heads for the M70, masking tape, Kiwi neutral shoe polish and modeling clay.
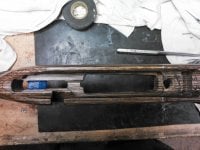
As it turned out Body's didn't have the stock set up square in the CNC inletting machine and the action holes were drilled off center. To get everything in a straight line I had to drill out the holes over size starting with a 3/8" bit and going up each size till I got to my largest which was 9/16" (17/31" is recommended) this being done so the bit would follow the say hole and not split out chunks of wood and then use a dremel tool with a drum sander to enlarge the holes even more.
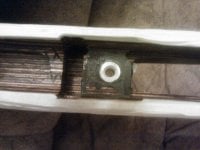
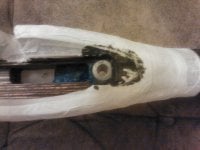
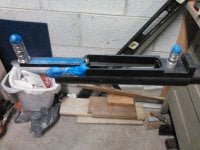
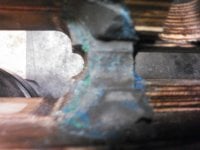
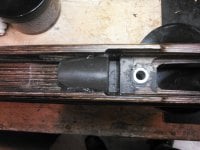
When cutting the pillars to fit the stock I started with the rear pillar and cut it with the dremel tool big mistake since I cut it too short and now was left with a decision to buy another kit or use what I had. So I used what I had and replaced the lost metal with a washer that came with the kit which just happened to be the right thickness. I waxed everything on the action that would come into contact with the epoxy except the pillars I also cut extra groves in the pillars to give more grip for the epoxy. The modeling clay was used to fill in spaces where I did want the epoxy to flow and taped up the wood to keep epoxy off it. It will get into places or on places you don't want it to and need to use enough that it over flows and spills out around the action and bottom holes but not too much so as not to have a mess.
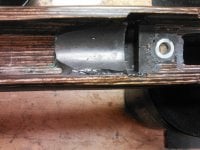
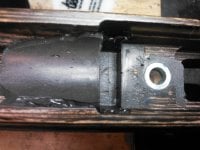
The pictures are not pretty and the job isn't completed since I have to bed the recoil lug and first 2 inches of the barrel.
Everyone shows their completed work but wanted to show those who haven't done this what to expect when they attempt it and really isn't hard if you have a good inleted stock to work with.
There will be more pictures when I bed the recoil lug and barrel in Part #2 of this post.
 

Attachments

  • NCM_0420.JPG
    NCM_0420.JPG
    1.1 MB · Views: 951
  • NCM_0421.JPG
    NCM_0421.JPG
    1.1 MB · Views: 951
  • NCM_0417.JPG
    NCM_0417.JPG
    1.1 MB · Views: 951
  • NCM_0418.JPG
    NCM_0418.JPG
    1.1 MB · Views: 951
  • NCM_0413.JPG
    NCM_0413.JPG
    1.2 MB · Views: 951
  • NCM_0411.JPG
    NCM_0411.JPG
    1.1 MB · Views: 951
Nice post!

I just finished re-bedding a portion of my stock after getting a new barrel. I was using one of those kits, with epoxy and a release agent.

It's always a tense time for me when I seat the action in, and tighten the action screws. I'm always thinking "please don't have screwed this up and have my action forever epoxied to my stock!" :mrgreen:

Great work!
 
Thanks NWBlacktail, I used to screw them down when I first bedded a rifle 35yrs ago but have learned that it's best to use as little pressure as possible now and only use electrical tape to hold the action in the wood for a stress free bedding.
 
You can either tape off or wax the mag well in the stock to keep the bedding compound from sticking. It helps with clean up. You can also fill it with Play-Doh/clay but too much bedding will push it out sometimes.
 
TD- Hats off to you for your bravery. I really like my Boyds stock, but I too had some problems with the fit on mine. Good people to work with and they made it right, but it is ....well, annoying. Guess things cant always be perfect, and in the end you will have more "invested" in the rifle when it shoots. More to be proud of the way I see it. Looks good so far. Cant wait to see pics of the finished project. Good luck! CL
 
cloverleaf thanks for the comments. This stock had it's problems also but it was custom ordered and couldn't be returned and they won't replace custom stocks. I'm glade I could bed it with out having a Gun Smith to do it because it sure needed the work that I did to it.
Devcon 10110 is not the easiest epoxy to work with do to it's 9-1 mix ratio and only mixing small quantities at a time it's hard to get the mix right. The batch I mixed for the pillars was a little runny compared to the last batch I mixed for the recoil lug and barrel support which was stiffer and didn't spread to all the areas as the pillar batch did but filled the recoil lug nicely with out any gaps and got a barrel pad in the rear about 1/4 round for the barrel to rest on.
I'll get some pictures after I get all the clay out of it .
 
IdahoCTD":1u4ziakk said:
They must have changed it because the 10110 I had was a 1 to 2 mixture.
I thought it was also but the directions say 9 parts putty to 1 part hardener. The more hardener you use the longer it takes to cure and can be soft when cured . I know that doesn't sound right but that's how I read the instructions and the directions on line. The good thing is it stays where you put it for the most part.
 
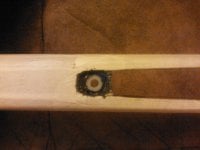
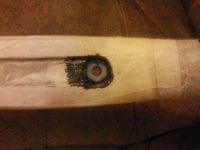
Here's some pics of the rest of the bedding job. Not really proud of it since it's the first I've done since 1980 and using a bedding compound I never used before. It's functional and I can't see it once the action is installed. I had to relieve some of the center action screw area for the sear since I filled in the channel it sets in but was no big deal just dremeled it out. Cleaning the clay out of the stock is a pain but it always was. Once it sets a couple of days I'll use some cleaner to get the clay out so it doesn't affect the epoxy.
 

Attachments

  • NCM_0427.JPG
    NCM_0427.JPG
    1 MB · Views: 854
  • NCM_0422.JPG
    NCM_0422.JPG
    1.2 MB · Views: 854
  • NCM_0424.JPG
    NCM_0424.JPG
    1.2 MB · Views: 854
  • NCM_0426.JPG
    NCM_0426.JPG
    1.1 MB · Views: 854
truck driver":9w150wvx said:
Here's some pics of the rest of the bedding job. Not really proud of it since it's the first I've done since 1980 and using a bedding compound I never used before.

That looks better than the bedding jobs I've done on my past couple rifles. It looks just fine, you should be proud of it. (y)

Fine craftsmanship my good man! :mrgreen:
 
NWBlacktail":16eec9dk said:
truck driver":16eec9dk said:
Here's some pics of the rest of the bedding job. Not really proud of it since it's the first I've done since 1980 and using a bedding compound I never used before.

That looks better than the bedding jobs I've done on my past couple rifles. It looks just fine, you should be proud of it. (y)

Fine craftsmanship my good man! :mrgreen:
Thanks NWBlacktail I appreciate the comments. The problem is I know I can do better though I'm out of practice doing it. There was a time of day when I would have cut some of it out and redo it and still might.
I'm happy with the pillars and the recoil lug just not the 2 inches in the forearm area which the epoxy is almost an inch thick in some places since Body's cut a channel threw the center to lighten the stock and I probably should have done it in 2 steps instead of one.
When I pillar bed the 35 Whelen AI I just might redo the forearm on this one since I will already have the epoxy mixed and can't see mixing just enough to dress this one up right now.
 
That makes good sense to touch it up with extra when your doing your Ackley.

The nice thing about Devcon and others is it will stick to themselves so you'll never notice where there were gaps.
 
Thanks to all who looked and commented. Part 2 of this will be the 35 Whelen AI after the New Year. Hoping to squeeze a little more accuracy out of it by pillar bedding it.
 
Good job Rodger, I am looking forward to seeing how your 35 Whelen AI turns out :wink:!!

Blessings,
Dan
 
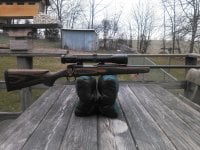
Put the action back into the wood so it could get a final set and cure since some of the area filled was rather thick. And now that it's cured I mounted the scope and it's ready for the range.
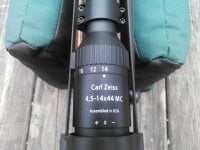
I put my Zeiss Conquest 4.5-14X44 MC SF on it I had on the 300 Wby. As soon as I get it sighted in it will be ready to reach out and touch something.
Click on pictures for enlarged view.
 

Attachments

  • NCM_0430.JPG
    NCM_0430.JPG
    1.3 MB · Views: 772
  • NCM_0428.JPG
    NCM_0428.JPG
    2.1 MB · Views: 772
  • NCM_0429.JPG
    NCM_0429.JPG
    2.2 MB · Views: 772
Looks great TD! That should really reach out nicely. A big 7 running 140-160's is serious hunting muscle.
 
Thanks Scotty, should have a range report soon if it stops raining long enough to get some shooting in. Hope to have the 35 Whelen AI done so I can shoot both the same day.
 
looks really great TD! What shooting bag is that? Also what Model and "color phase" is that's boyds? CL
 
cloverleaf":gq45sm1j said:
looks really great TD! What shooting bag is that? Also what Model and "color phase" is that's boyds? CL
CL, it is their Platinum model and the color is called Nut Meg. Thanks I'm glad you like it.

PS, the bag is a Caldwell . Not as expensive as the Bulls bag but it will get the job done.
 
Back
Top