- Thread starter
- #21
I have some progress to report.
First, I would like to apologize to sako2 who wrote, "NYDAN looking at your pictures I see copper shavings." I responded with "it must be an anomaly of the photographs. I closely inspected the loaded bullets and could not see any shavings." Apparently, the copper shavings had gotten wiped off the bullets between the time I photographed them and the time I inspected them based on sako2's comments. Later, when I was seating another set of bullets I did find copper savings. So, sako2's observations were correct and I was wrong.
I ordered additional expander mandrels from 21st Century Innovation. They offer expanders in increments of 0.0005" inches. I ordered 0.2635" and 0.2640" expanders. I ordered a VLD neck chamfering tool.
I had noted that after I had tumbled brass, the co-efficient of friction in the neck and primer pockets increased significantly. That was adding to the seating force required to seat the bullets.
So, after receiving the above mentioned, previously ordered honed seating stem. I did a few things:
I shot the five cartridges and got the following results:

The average velocity had dropped quite a bit from where it had been.
Next, I had to perform brass prep on this lot of brass and am now shooting 4x fired, annealed, and tumbled brass.
I made an adjustment to powder charge and shot this target:

Next, I expanded directly from resizing using the 0.2635 expander and NOT using the 0.2627 expander at all.
My measurements indicate that the one step expansion resulted in a little less, AND MORE CONSISTENT, neck tension at 0.0012 to 0.0014 inches. This is my preferred method. I only the two step before because the necks had previously been expanded.
This morning, I shot this target:

This load seems to be shooting about a 0.5" group now.
First, I would like to apologize to sako2 who wrote, "NYDAN looking at your pictures I see copper shavings." I responded with "it must be an anomaly of the photographs. I closely inspected the loaded bullets and could not see any shavings." Apparently, the copper shavings had gotten wiped off the bullets between the time I photographed them and the time I inspected them based on sako2's comments. Later, when I was seating another set of bullets I did find copper savings. So, sako2's observations were correct and I was wrong.
I ordered additional expander mandrels from 21st Century Innovation. They offer expanders in increments of 0.0005" inches. I ordered 0.2635" and 0.2640" expanders. I ordered a VLD neck chamfering tool.
I had noted that after I had tumbled brass, the co-efficient of friction in the neck and primer pockets increased significantly. That was adding to the seating force required to seat the bullets.
So, after receiving the above mentioned, previously ordered honed seating stem. I did a few things:
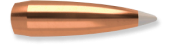
- I switched to the 130 gr. Sierra Tipped Game King (Game Changer) bullet.
- I installed the custom honed seating stem in the seating die.
- I used the 0.2635" expander and expanded the necks again using graphite lubricant.
- I left any residual graphite from the secondary expanding operation in the case necks.
I shot the five cartridges and got the following results:
The average velocity had dropped quite a bit from where it had been.
Next, I had to perform brass prep on this lot of brass and am now shooting 4x fired, annealed, and tumbled brass.
I made an adjustment to powder charge and shot this target:
Next, I expanded directly from resizing using the 0.2635 expander and NOT using the 0.2627 expander at all.
My measurements indicate that the one step expansion resulted in a little less, AND MORE CONSISTENT, neck tension at 0.0012 to 0.0014 inches. This is my preferred method. I only the two step before because the necks had previously been expanded.
This morning, I shot this target:
This load seems to be shooting about a 0.5" group now.