pre6422hornet
Handloader
- Jan 24, 2012
- 974
- 9
I purchased a stock of Ebay for my 1949 pre 64 70 in .270. I have always wanted to inlet a stock myself and I figured I might as well do it. The stock is a little shorter than factory ( about 1/2 inch) and it has a Pachmeyer already ground to fit, but I may take that off and install a whiteline to get the dimensions back to factory. The current stock on my 70 is 1/2 inch shorter than factory so either way it will be okay. I use this rifle primarily on wet days when I can stalk through the woods so the shorter length actually is really nice.
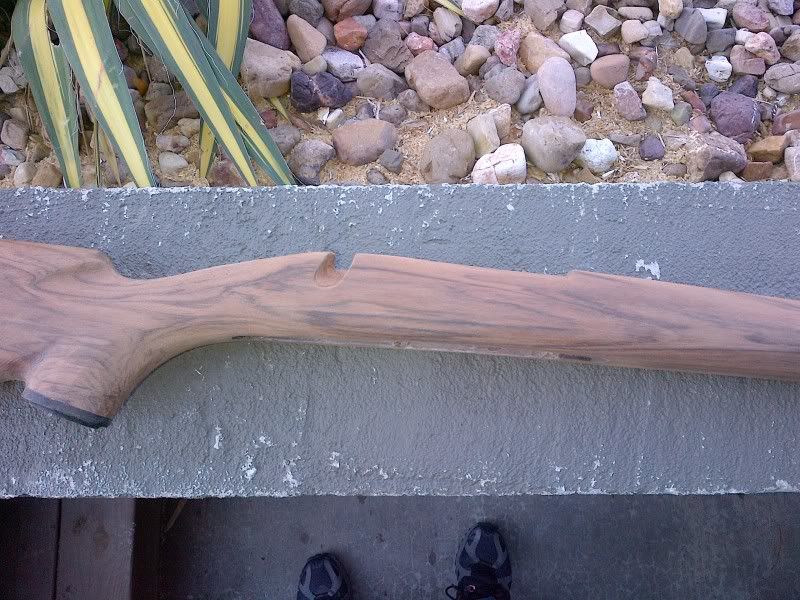
The barrel channel is only 1/4 of an inch opened so I have a lot of work to do on it, and the stock is very rough and oversized. I am planning on performing all the work by hand with no Dremel or power tools, but we will see. I have all the sandpaper I need, and I hope to use the Armorall/Tru oil combo to finish. I have some Tru oil already. I am also going to perform the checkering my self, again the first time I have tried it.
The add on Ebay just said "Fancy Walnut Stock". I was able to get it for 150.00 and when I rec'd it, the stock had a product number and a price tag of 450.00 inside the magazine area :?:
I have no idea who machined it as the seller had no idea.
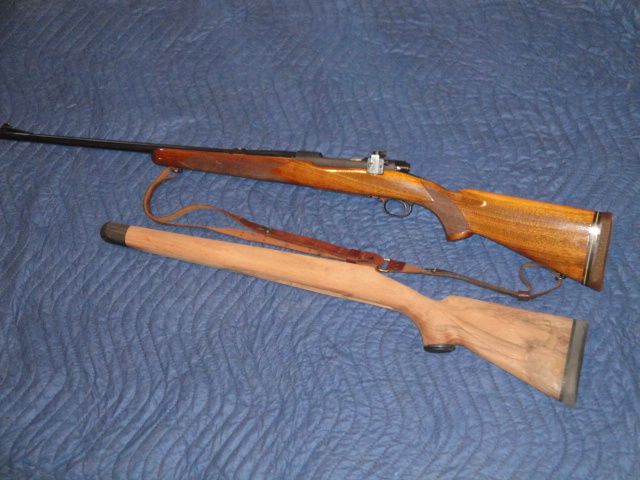
Well here are some pics of before next to the current stock.
It has the shadowline cheekpiece that I love and the black streaks in the stock look really nice.
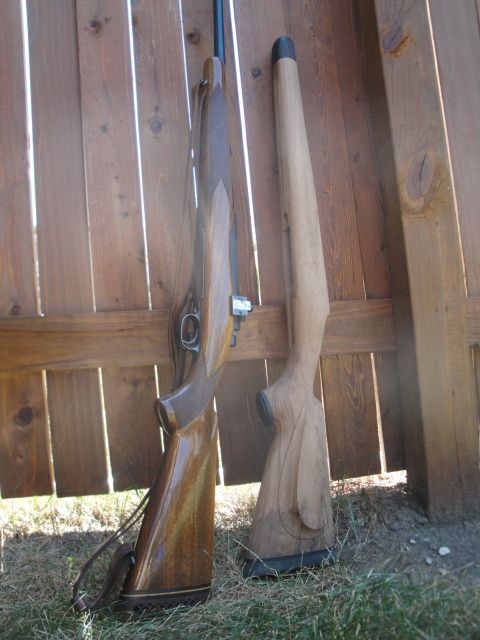
Here is a pic outside against the fence.
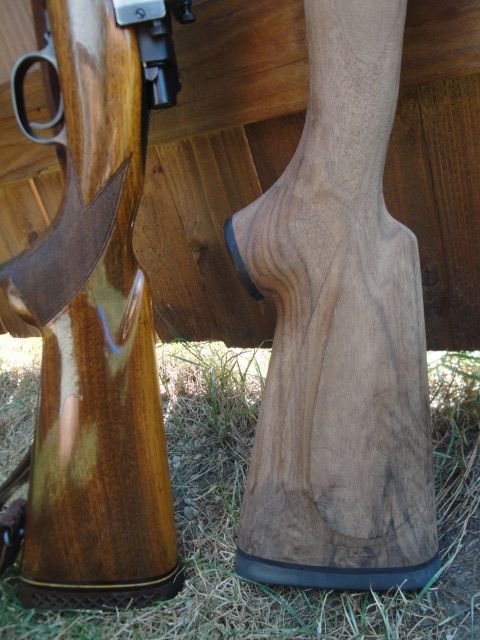
and a close up of the butt, showing the dark lines.
If anyone has idea what type of walnut this is just by looking at it, please speak up. I have had three people look at pics of it and all three suggested that it is Bastogne, but I can only take their word.
Anyway I am documenting the progress and hopefully taking a whitetail or two with it fall of 2013 ( or maybe a bull elk).........
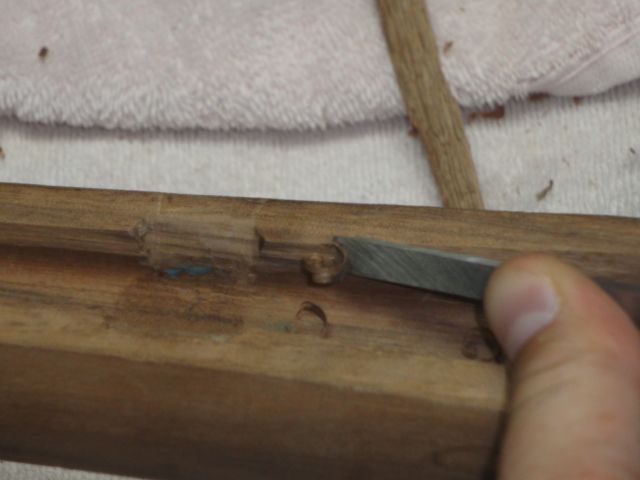
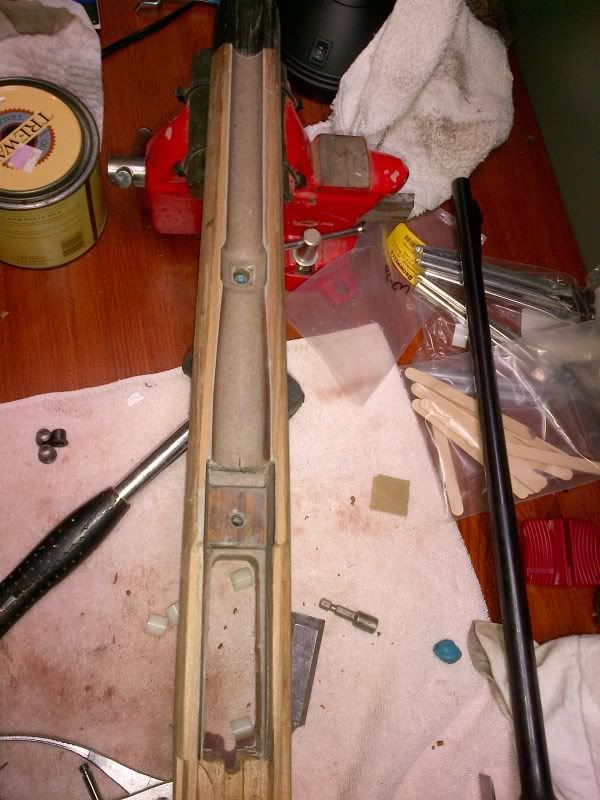
Well I am completely done with the bedding. I have been true to my word and used zero power tools. I primarily used a 1/4 inch chisel, sandpaper, dowel rod, sanding block, a couple files, and that is it.
Here is the day I started:
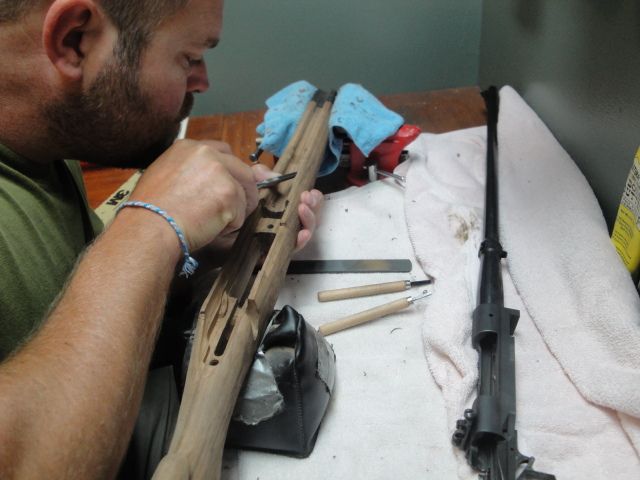
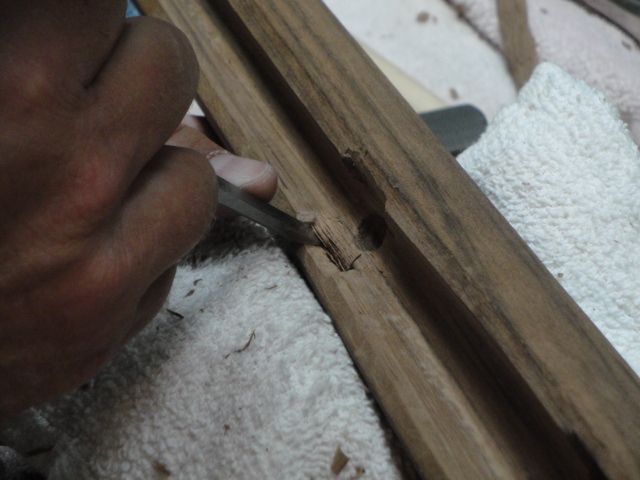
Inletting the chamber area with a 1/4 inch chisel.
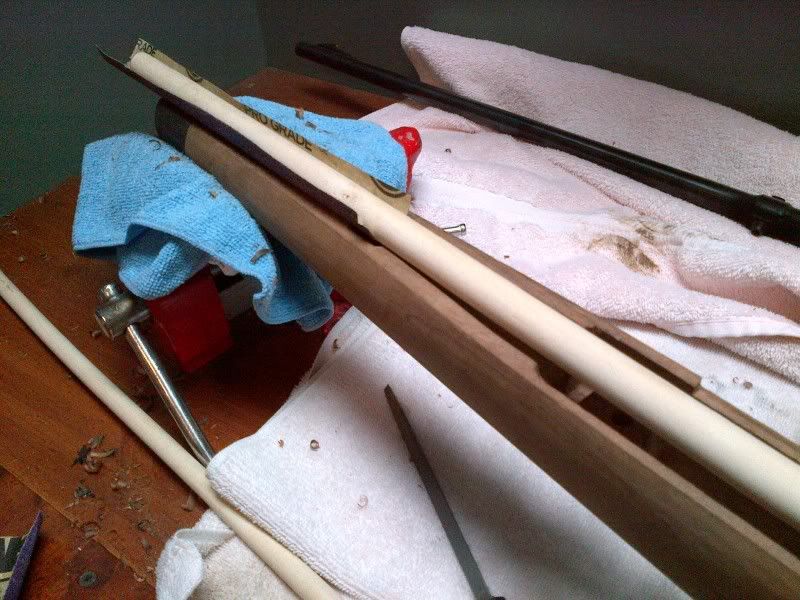
Here is how I did the barrel channel. 60 grit with a dowel rod.. Back and forth, back and forth. etc... :
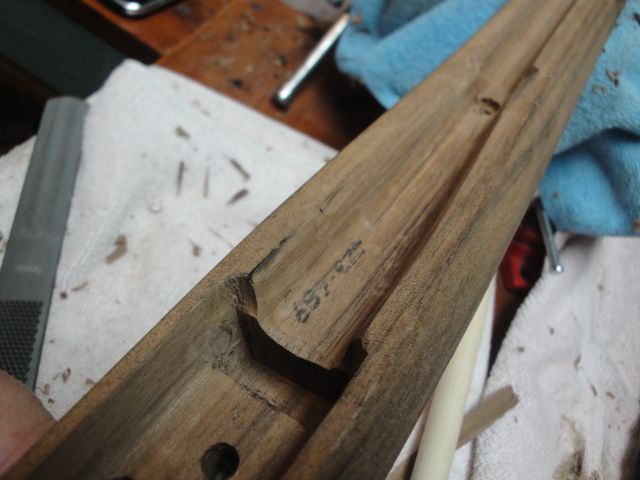
I went completely old school by using a sooty flame to "soot" the action and then press into the stock instead of using inletting black. Here is what it looks like. You can see the black marks on the chamber area indicating the high spots. :
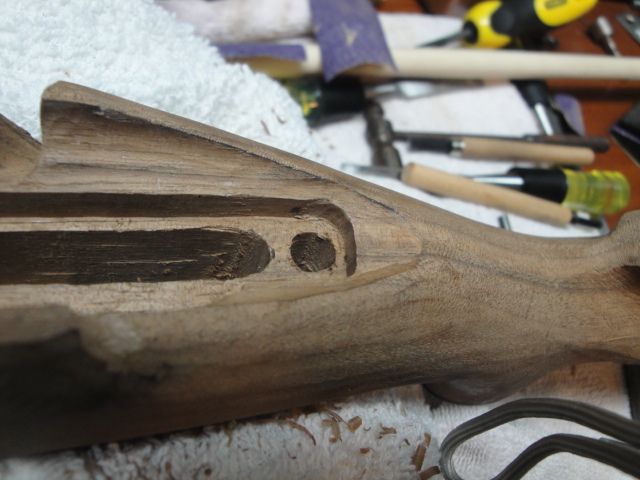
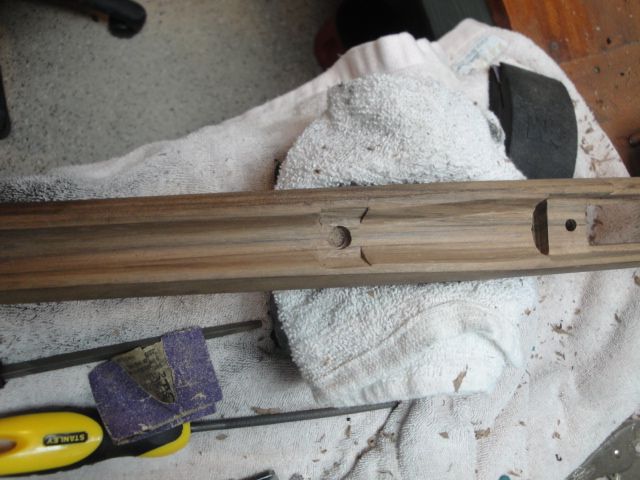
Inletting the barrel band ( probably the hardest part actually ). This was not even there in the stock before I started. Sharp chisels are key to all of this and I kept my sharpening stones close at hand. My grandpa always told me " A sharp knife or chisel is a safe one".
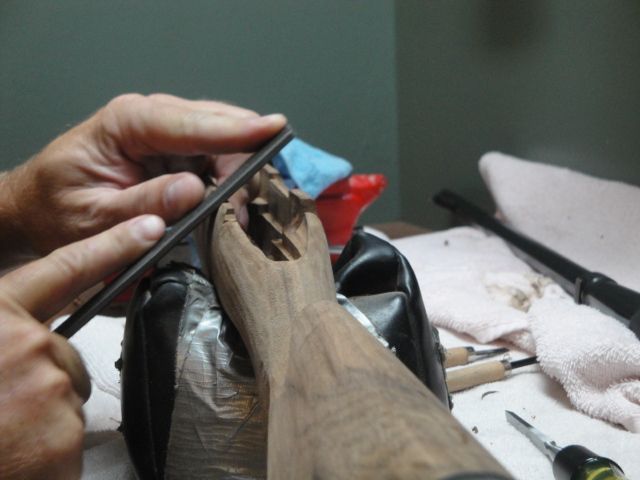
Inletting the lyman 48:
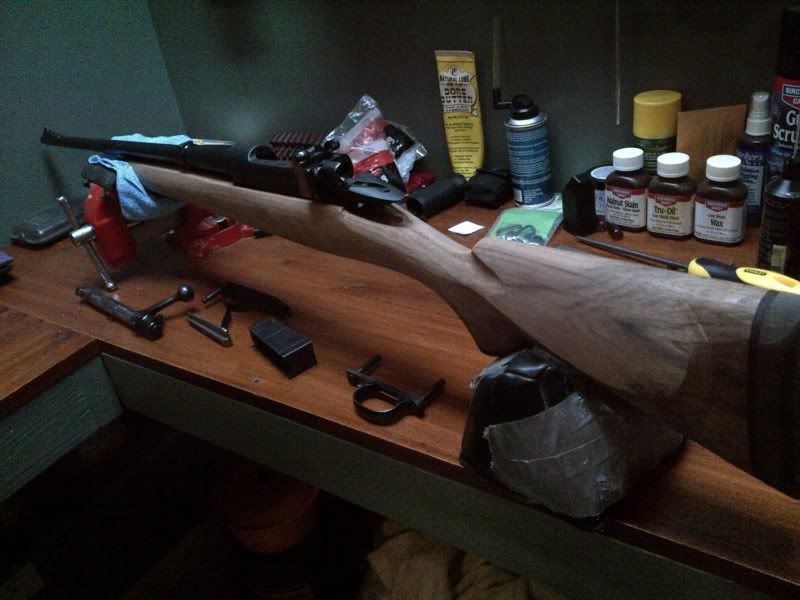
Complete ready for bedding:
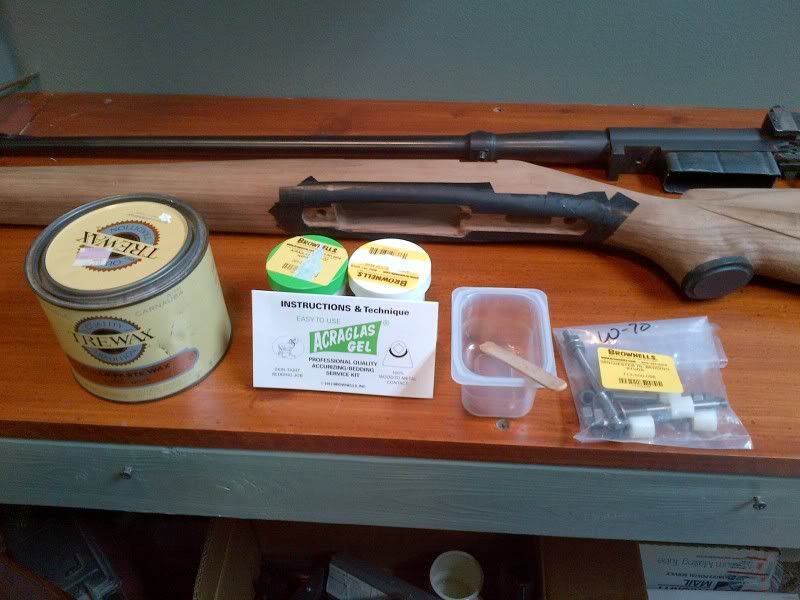
Materials I used:
I completely inletted the bottom metal first. Gerber Baby food containers make perfect mixing bowls.
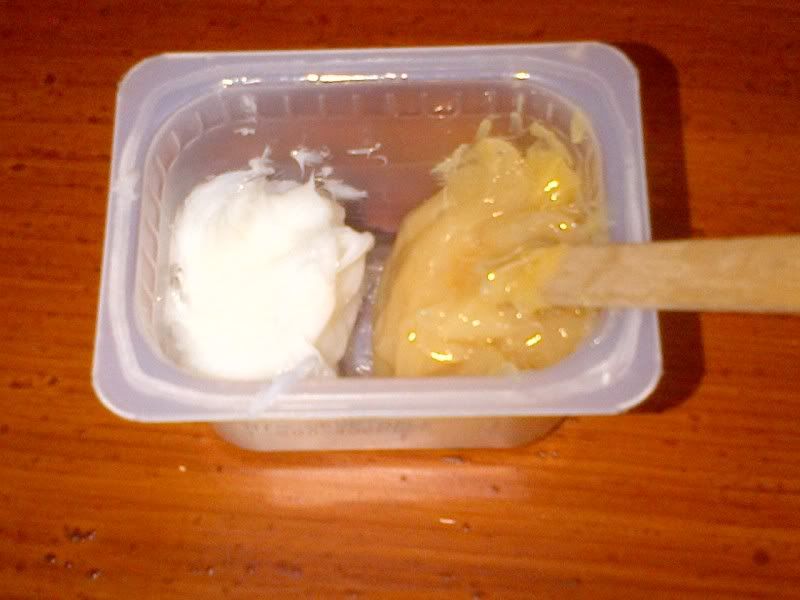
Accraglass gel before mixing:
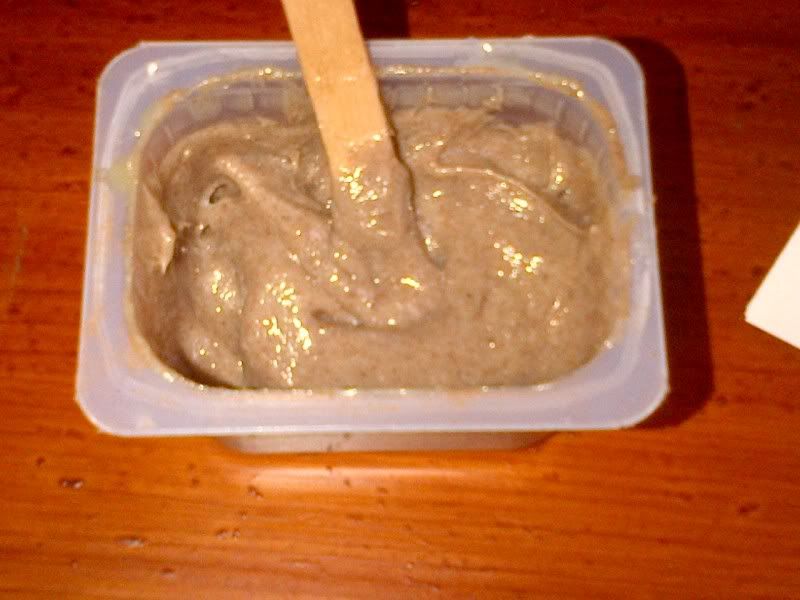
After mixing and adding walnut dust from my stock to color blend it:
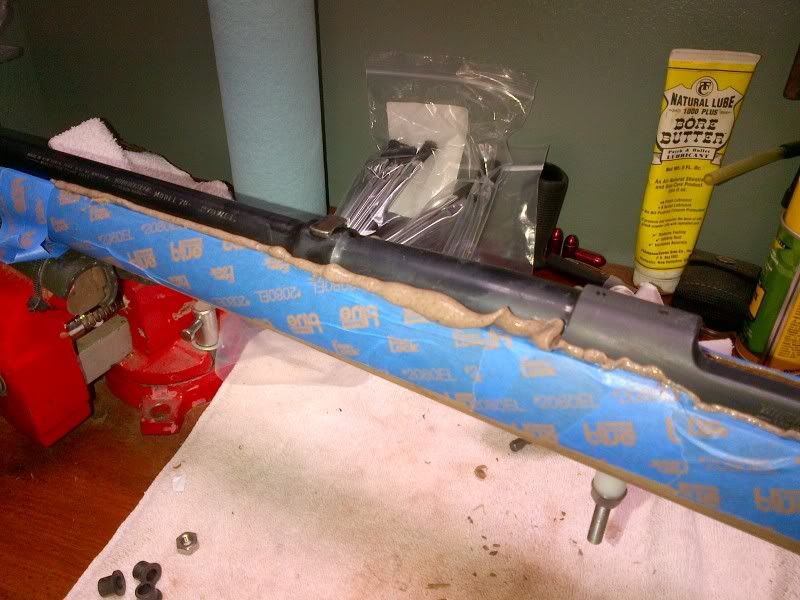
I used a small paintbrush and painted the bedding compound in the entire barrel, action and tang section. The magazine well also was completely bedded in.:
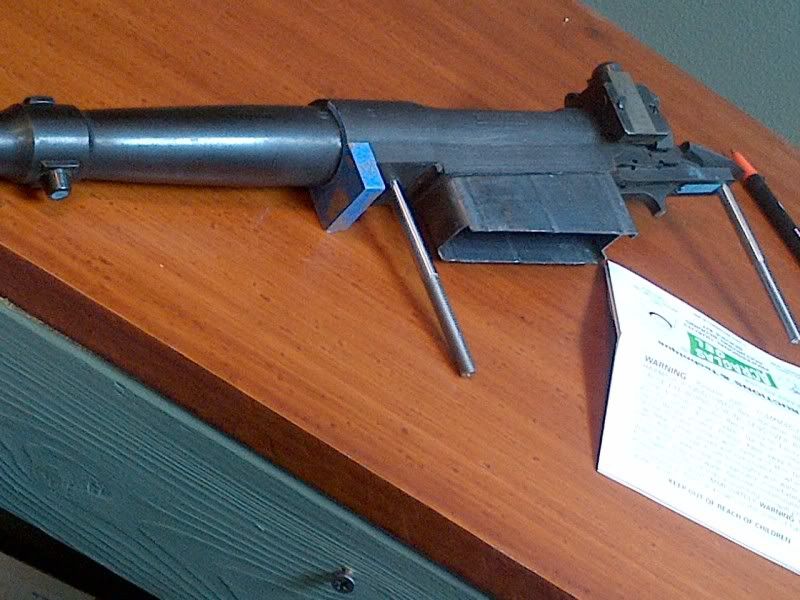
Pic of the action ready for install. I used Brownells action bedding studs. This makes it impossible to get bedding compound inside the threaded portion of the action. They are easy to use and I give them a thumbs up. I also put one layer of painters tape on the front, sides and bottom of the recoil lug to ease in pulling apart and reinstillation.
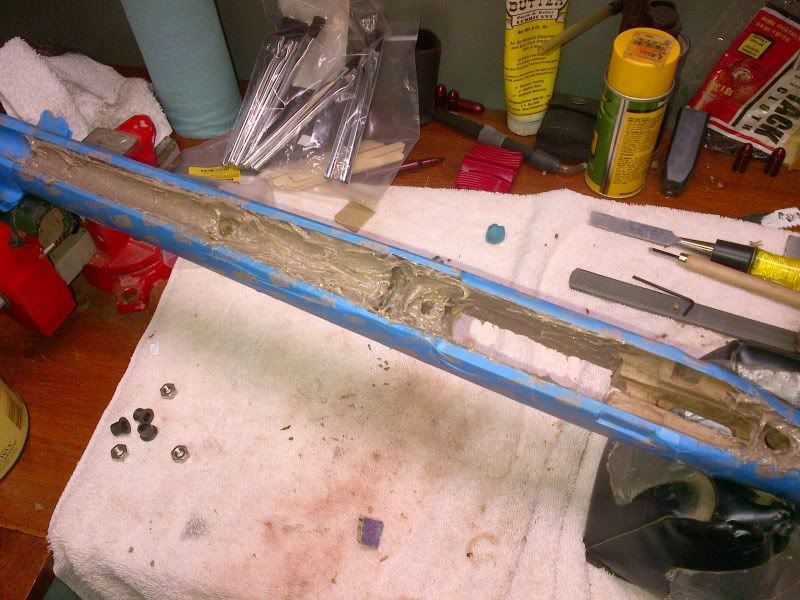
Action installed and bedding compound squeezing out:
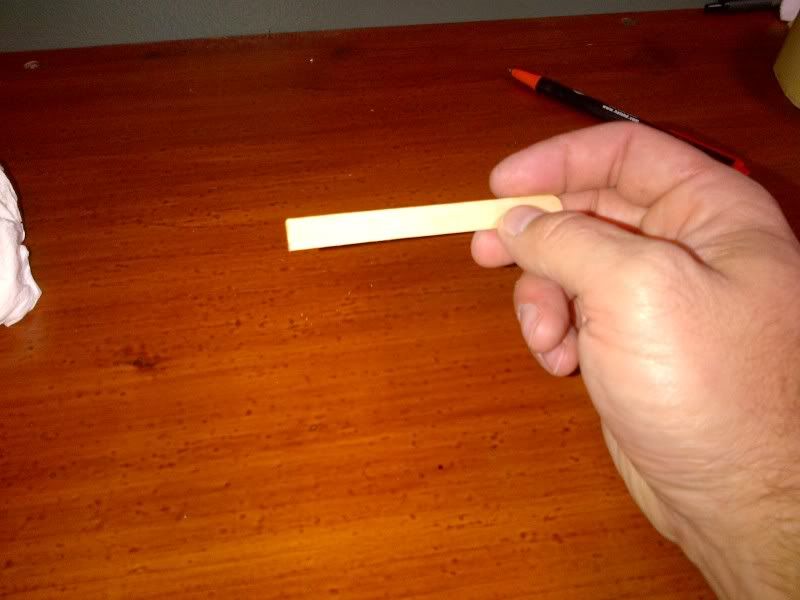
I then used a popsicle stick and cut it at a 90degree on one end and scraped the bedding compound out of the way:
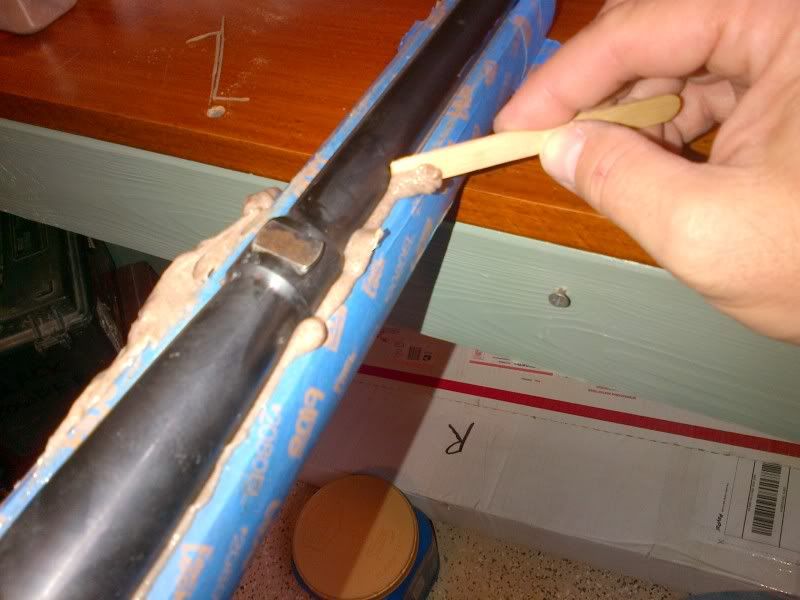
Here it is all pulled out and excess sanded away.
Now I can start final sanding in prep for finish and checkering. I will keep you all posted.
The barrel channel is only 1/4 of an inch opened so I have a lot of work to do on it, and the stock is very rough and oversized. I am planning on performing all the work by hand with no Dremel or power tools, but we will see. I have all the sandpaper I need, and I hope to use the Armorall/Tru oil combo to finish. I have some Tru oil already. I am also going to perform the checkering my self, again the first time I have tried it.
The add on Ebay just said "Fancy Walnut Stock". I was able to get it for 150.00 and when I rec'd it, the stock had a product number and a price tag of 450.00 inside the magazine area :?:
I have no idea who machined it as the seller had no idea.
Well here are some pics of before next to the current stock.
It has the shadowline cheekpiece that I love and the black streaks in the stock look really nice.
Here is a pic outside against the fence.
and a close up of the butt, showing the dark lines.
If anyone has idea what type of walnut this is just by looking at it, please speak up. I have had three people look at pics of it and all three suggested that it is Bastogne, but I can only take their word.
Anyway I am documenting the progress and hopefully taking a whitetail or two with it fall of 2013 ( or maybe a bull elk).........
Well I am completely done with the bedding. I have been true to my word and used zero power tools. I primarily used a 1/4 inch chisel, sandpaper, dowel rod, sanding block, a couple files, and that is it.
Here is the day I started:
Inletting the chamber area with a 1/4 inch chisel.
Here is how I did the barrel channel. 60 grit with a dowel rod.. Back and forth, back and forth. etc... :
I went completely old school by using a sooty flame to "soot" the action and then press into the stock instead of using inletting black. Here is what it looks like. You can see the black marks on the chamber area indicating the high spots. :
Inletting the barrel band ( probably the hardest part actually ). This was not even there in the stock before I started. Sharp chisels are key to all of this and I kept my sharpening stones close at hand. My grandpa always told me " A sharp knife or chisel is a safe one".
Inletting the lyman 48:
Complete ready for bedding:
Materials I used:
I completely inletted the bottom metal first. Gerber Baby food containers make perfect mixing bowls.
Accraglass gel before mixing:
After mixing and adding walnut dust from my stock to color blend it:
I used a small paintbrush and painted the bedding compound in the entire barrel, action and tang section. The magazine well also was completely bedded in.:
Pic of the action ready for install. I used Brownells action bedding studs. This makes it impossible to get bedding compound inside the threaded portion of the action. They are easy to use and I give them a thumbs up. I also put one layer of painters tape on the front, sides and bottom of the recoil lug to ease in pulling apart and reinstillation.
Action installed and bedding compound squeezing out:
I then used a popsicle stick and cut it at a 90degree on one end and scraped the bedding compound out of the way:
Here it is all pulled out and excess sanded away.
Now I can start final sanding in prep for finish and checkering. I will keep you all posted.